Enchantment Learning & Living Blog

Welcome to Enchantment Learning & Living, the inspirational space where I write about the simple pleasures, radical self-care, and everyday magic that make life delicious.

Pina Colada Popsicles

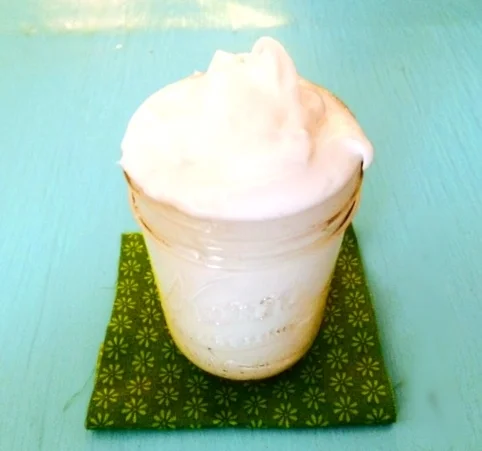
So it's hot out.  Like, really hot.  As in 100 degrees hot!  Normally I love the desert summer, but I've found myself beginning to wilt in this heat.  Forget cooking anything that involves the oven or even the stove for that matter.  And you won't catch me baking under the midday sun.  Most of my time is now spent finding ways to stay cool in the midst of this heat wave.  Luckily, I have a perfect antidote to Albuquerque when it sizzles: these pina colada popsicles.  Yum!

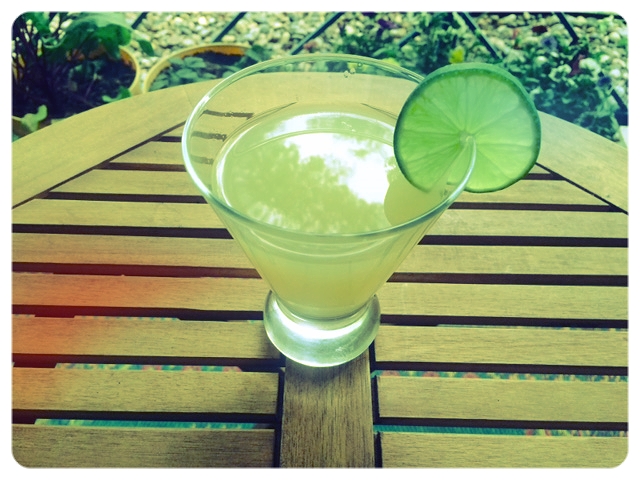
They are reminiscent of carefree days on the beach, sipping that rum-soaked pineapple and coconut concoction finished off with a little umbrella...only better because I use only healthy ingredients in this recipe.  I swap out super sugary coconut cream with coconut milk and coconut water and use frozen pineapple for that pop of fruity goodness. What's more, these are super easy to make!  All you need is a popsicle mold which you can find here or at your local cooking store (and sometimes even at your supermarket). 

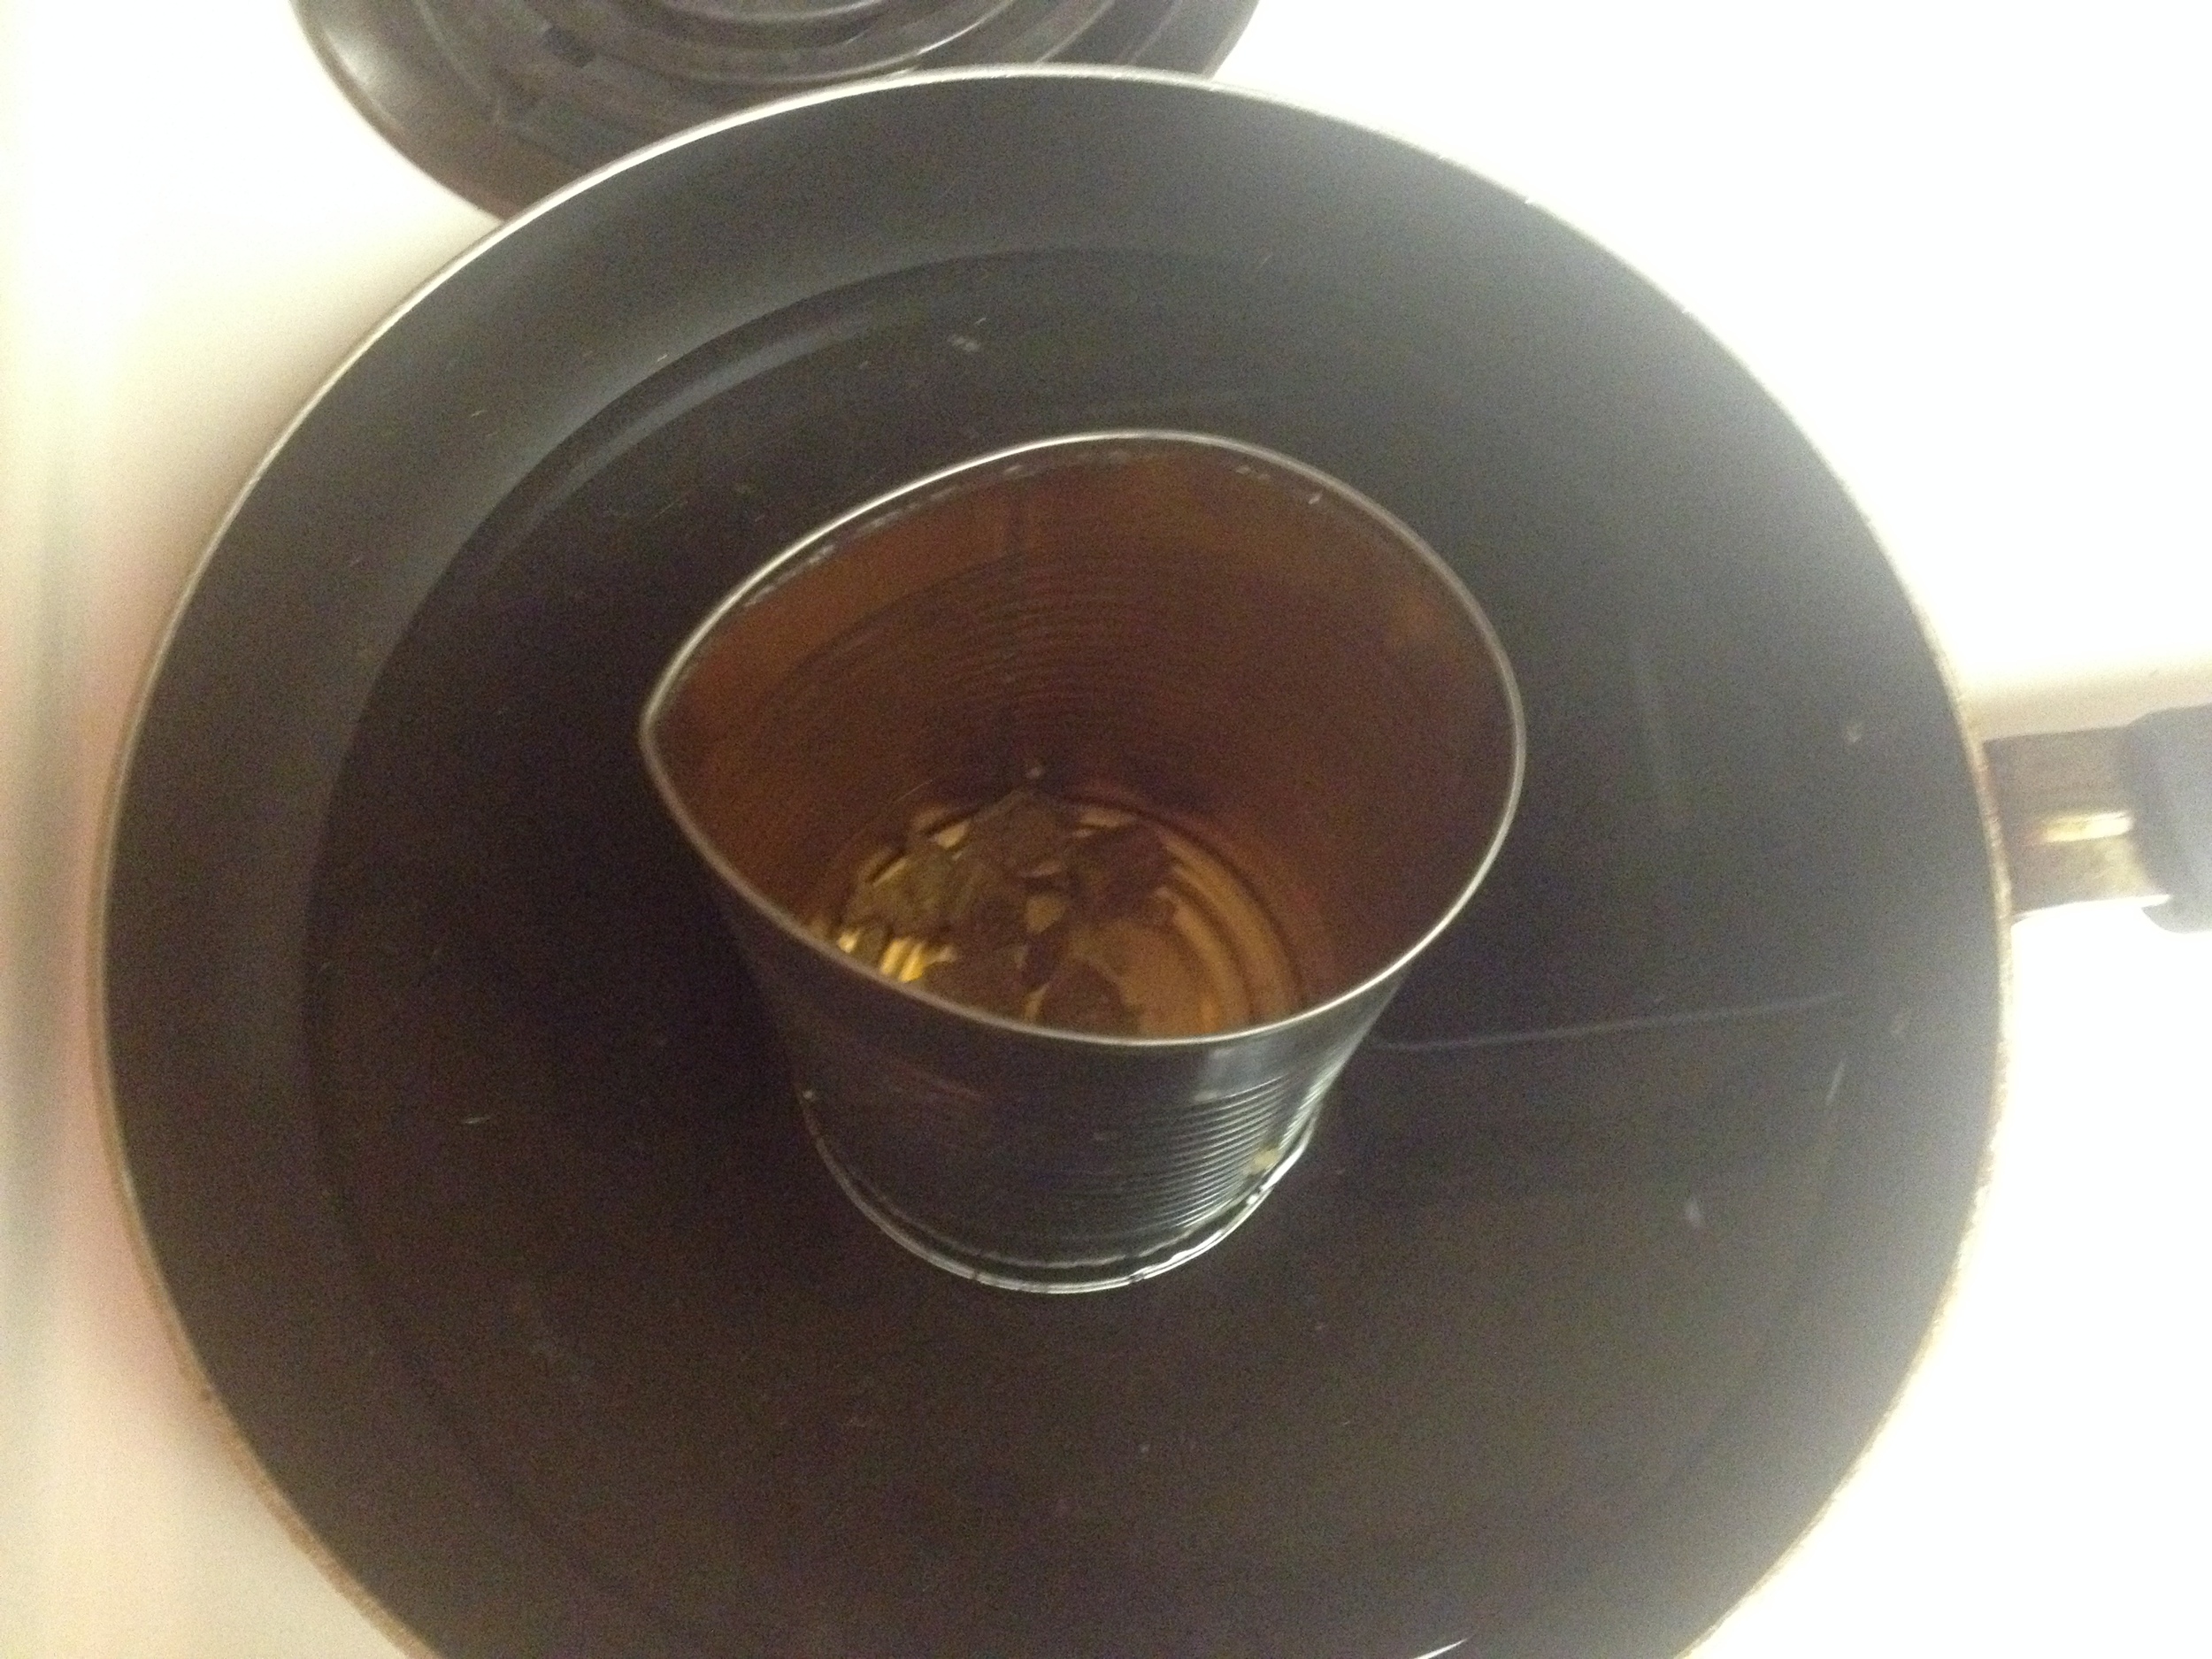
As with my other recipes, I use only organic ingredients for maximum healthy benefits and best-tasting results.  Make sure to use canned coconut; the taste is richer than the carton variety--and don't be alarmed if the coconut cream is solid at the top of the can.  It mixes easily with the liquid part on the bottom once you stir it up. It would also be a good idea to whip up a double batch of these popsicles because when the temperature goes up, they go fast! 

Ingredients:

1 cup coconut milk

1 cup coconut water

 1 1/2 cups frozen pineapples

1 ripe banana

Puree ingredients in a blender until smooth.  Pour mixture into popsicle molds and let sit in freezer for at least two hours or until frozen.  I usually make them a day ahead and let them set overnight.  Let the treats sit on the counter for five to ten minutes and then remove them from the mold.  Eat immediately, with gusto!  Makes about 6 with a little left over for a pina colada smoothie, rum optional.

Enchantment Learning & Living is an inspirational blog celebrating life’s simple pleasures, everyday mysticism, and delectable recipes that are guaranteed to stir the kitchen witch in you. If you enjoyed what you just read and believe that true magic is in the everyday, subscribe to my newsletter below for regular doses of enchantment. Want even more inspiration? Follow me on Instagram, Facebook, Pinterest, and Twitter. Here’s to a magical life!

Fried Sage Chips

One of my go-to appetizers come the weekend are these delicious and easy to make sage chips.  They combine my love of fresh herbs with all the tastiness of a kale chip but are dainty enough to nibble on as you enjoy an evening cocktail. I even hesitate to use the word "fried" in my blog title because these chips aren't greasy or heavy, just light and crisp.

There is nothing like the woodsy taste of the sage paired with the pop of sea salt on the tongue to prepare your palate for your evening meal.  It's the taste of this dish and taking the time to enjoy a pre-dinner drink that matters, rather than filling up on a heartier snack--it's like the Italian version of an appetizer in that way, making you slow down and enjoy the simple pleasure of a luxurious dinner.   Like my roasted garlic scapes, these sage chips only require good olive oil and sea salt to make them tasty--you can always add a pop of brightness to them with my 3 Citrus Himalayan Salt.

Ingredients:

1 bunch organic sage leaves

Olive oil

Sea salt

In a saucepan, heat olive oil on medium heat.  Use only enough olive oil to thinly coat the bottom of the pan, about 2-3 tablespoons.  Once oil is hot, place sage leaves in pan and let fry until they begin to get crispy and golden, but not burned (about one minute).  Make sure not to pile too many leaves into the oil at once, otherwise they will get mushy.  You may have to fry them in batches.  Promptly remove from heat and set on paper towel to drain.  While the leaves are still hot, sprinkle them with sea salt.  Serve immediately.  Enjoy!

Enchantment Learning & Living is an inspirational blog celebrating life’s simple pleasures, everyday mysticism, and delectable recipes that are guaranteed to stir the kitchen witch in you. If you enjoyed what you just read and believe that true magic is in the everyday, subscribe to my newsletter below for regular doses of enchantment. Want even more inspiration? Follow me on Instagram, Facebook, Pinterest, and Twitter. Here’s to a magical life!

Roasted Garlic Scapes

Imagine my delight to find garlic scapes at the farmers' market this weekend!  Here I had thought that the season for these tender shoots had come and gone without me being able to feast on these perfect greens (I comforted myself with an unexpected batch of fiddlehead ferns).  For those of you that don't know, scapes are the flower stalk of the garlic plant that are harvested before they flower so the plant sends its energy into developing the garlic bulb.  Picked early in the season, they have a mild garlic taste with hints of earthy asparagus.  Yum!

Typically, I indulge in this magical season by feasting on roasted garlic scapes.  I like to roast them for a long time so that they are one part meltingly tender and another part garlic crisps.  The great thing about scapes is that they don't need much to make a tasty appetizer.  In fact, I only ever use olive oil and quality salt.  If I feel like getting fancy, I sprinkle some of my 3 Citrus Himalayan Salt over the curled greens. 

You'll notice that I didn't specify quantities here.  I roast as little as a handful to a whole basketful depending on how many people I'm serving, so the recipe is pretty versatile.  Just remember that the more scapes you use, the longer you want to roast them--especially if you want them slightly crispy.

Raw scapes ready for roasting.

Raw scapes ready for roasting.

Ingredients:

Garlic Scapes

Olive Oil

Sea Salt

Preheat oven 350 degrees.  Place washed scapes on one side of a large sheet of foil and sprinkle with olive oil and salt.  Fold other half of foil over the scapes and pinch the open sides closed so that you create a little pouch for the scapes to cook in.  Place on a baking sheet and let roast in over for 30 minutes to an hour.  Remember, the longer you cook them, the crispier they get, so cook they according to your own preference.  Let cool for five minutes before plating.  Enjoy!

Enchantment Learning & Living is an inspirational blog celebrating life’s simple pleasures, everyday mysticism, and delectable recipes that are guaranteed to stir the kitchen witch in you. If you enjoyed what you just read and believe that true magic is in the everyday, subscribe to my newsletter below for regular doses of enchantment. Want even more inspiration? Follow me on Instagram, Facebook, Pinterest, and Twitter. Here’s to a magical life!

Thank Goodness It Ain't Maybelline Clear Mascara

About a year ago, I posted a recipe for my Thank Goodness it Ain't Maybelline Mascara made from beeswax, coconut oil, and activated charcoal--much safer and cheaper than your average drugstore beauty product.  It has all the effects of a quality mascara without the scary chemicals.  Yet even homemade mascara can be fated to cause the much maligned racoon eyes, natural enemies of a perfectly quaffed look, especially in the summer when the desert heat sets everything to melting and sweating.

With this in mind, I put together a clear mascara recipe for those hot summer days when you want to look a little extra polished but don't want to be constantly worrying about black circles around your eyes.  Like any clear mascara, it offers a little extra length and curl, but won't necessarily give you the high-drama of super long, dark lashes...which is just fine by me come summer time when the less makeup, the better.

The recipe is much the same as my black mascara, swapping out the charcoal for the aloe vera gel for added lightness.  The mix comes out slightly yellow in the tube because of the beeswax, but it does go on clear.  Make sure when you apply it to really comb through your lashes so the oil goes on evenly without clumping.  You should also run an eyelash comb through your strands to get a more even look.  You can recycle old mascara tubes for this or buy new ones here.

Ingredients:

2 tsp coconut oil


1/2-1/3 tsp grated beeswax


1 tsp aloe vera gel (optional)

Melt beeswax on low heat.  I do this by placing the wax in a clean tin can.  This tin can then goes in a saucepan with about one inch of water in it (see photo). Once the beeswax is melted, mix remaining ingredients into can and allow to melt.  Remove from heat and carefully pour liquid into your clean mascara tube.  I do this by pouring from a tin can that has been pinched on one end to create a spout (again, see photo) or by pouring the cooling mixture into a plastic bag that has a corner cut out of it.  Place the open corner of the bag inside the mascara tube and slowly push the liquid into the tube.  Allow to cool before using. Makes one tube.

Enchantment Learning & Living is an inspirational blog celebrating life’s simple pleasures, everyday mysticism, and delectable recipes that are guaranteed to stir the kitchen witch in you. If you enjoyed what you just read and believe that true magic is in the everyday, subscribe to my newsletter below for regular doses of enchantment. Want even more inspiration? Follow me on Instagram, Facebook, Pinterest, and Twitter. Here’s to a magical life!

Turmeric Lemongrass Bath Bombs (sans Citric Acid)

Mother's Day is just around the corner.  School is done.  You have a free weekend afternoon for a bubble bath and a long nap...clearly, there are a myriad of reasons why you should make these super easy bath bombs to have on hand for those oh so important occasions!  The big one, of course, is that special day we take to celebrate our awesome moms, those strong women who spend so much time caring for others that it is important that we take time out to care for and pamper them.  These turmeric lemongrass bath bombs are the perfect gift for the woman who could use a luxurious soak (with a good book and a glass of wine!).

What I love about these bath bombs is that they are made without citric acid--a sometimes difficult ingredient to find and keep on hand.  The cream of tartar is a perfect substitute and something we often have (and forget about) in our pantry.  Turmeric is also an easy kitchen staple to add to these bombs and it is what gives them their festive sunshine hue.  Don't be alarmed if this bright yellow doesn't initially come through when you mix the dry ingredients--it will once you wet them down.

Like my spring bath bombs, these hedonistic treats use the smells and flowers of spring to rejuvenate the senses.  In this case, I use lemongrass, that universal revitalizer, mixed with calendula petals known for their ability to soothe the skin.  Tumeric is also a wonder-cure for many skin issues from acne to eczema.  The baking soda gently detoxes and exfoliates your skin while the cream of tartar softens it.

Ingredients:

2 cups baking soda

1 cup cream of tartar

1 tsp turmeric powder

4 teaspoons melted coconut oil

1/8 cup water (in spray bottle)

100 drops lemongrass essential oil

1/4 cup dried calendula petals (optional)

Combine all dry ingredients in a bowl and mix thoroughly, being careful not to raise too much dust.  Then add in coconut oil and essential oil and mix thoroughly with hands, making sure that oil is evenly distributed throughout the mix.  Here comes the tricky part: adding the water.  You need the spray bottle to ensure that you aren't adding too much water at once otherwise your bath bombs will begin to prematurely fizz. 

Going slowly, spray water into the bowl, stirring completely as you go until it is damp but not soaking wet.  You will probably not use all the water in your spray bottle.  You can test the readiness of your mix by squeezing together a handful of it and seeing if it sticks--if it does, you can go ahead and place it in molds or roll them into balls.  If not, you'll need more water.  Once you have placed the mix into molds or hand shaped it into balls, you can let your bath bombs air dry for at least two hours or up to overnight.  Remove from molds (if using) and store in a dry place.  Makes about 9 bath bombs.  Enjoy!

Enchantment Learning & Living is an inspirational blog celebrating life’s simple pleasures, everyday mysticism, and delectable recipes that are guaranteed to stir the kitchen witch in you. If you enjoyed what you just read and believe that true magic is in the everyday, subscribe to my newsletter below for regular doses of enchantment. Want even more inspiration? Follow me on Instagram, Facebook, Pinterest, and Twitter. Here’s to a magical life!

Naked Margarita

Margaritas are one of the most festive summer drinks--and the ones most susceptible to too many sugar-laden ingredients.  In reality, all a great margarita needs is a few things: good tequila, juicy limes, a dash of sweetness, and a handful of ice.  If you want to get carried away, you can rim your glass with salt, but I never do. 

With this in mind, I present to you my naked margarita, stripped from the overly-sweet triple sec or other frou-frou ingredients, so that you taste nothing but the sweet burn of tequila and lime on your tongue. I like to make mine using agave syrup.  But If I'm in a pinch, I've been known to use my stevia herb simple syrup or actual simple syrup (recipe found here--just omit the ginger, or keep it for an extra kick!).  Play around with the sweetness factor.  I like to taste the tartness of the lime more than the sweet, so if you like a sweeter drink, by all means, add more simple syrup. Look for tequila that is 100% agave; the other stuff is full of more additives and fake coloring than actual tequila.  And please, please, please use fresh organic limes--they make all the difference in the world.

Ingredients:

1 oz fresh lime juice

2 oz tequila

1/2 oz agave nectar

ice

Combine ingredients in a shaker and shake thoroughly until ice begins to melt, about 30 seconds.  Strain into chilled glass.  Garnish with a lime if desired.  Makes one serving.  Feel free to be as naked as your margarita while you drink it.  Enjoy!

Enchantment Learning & Living is an inspirational blog celebrating life’s simple pleasures, everyday mysticism, and delectable recipes that are guaranteed to stir the kitchen witch in you. If you enjoyed what you just read and believe that true magic is in the everyday, subscribe to my newsletter below for regular doses of enchantment. Want even more inspiration? Follow me on Instagram, Facebook, Pinterest, and Twitter. Here’s to a magical life!

Stevia Herb Simple Syrup

So I know claiming to have a sugar free simple syrup recipe to share sounds too good to be true--or full of those chemical-laden alternative sugars that are way worse for you than any spoonful of the sweet stuff.  This recipe, however, is really as good as it sounds and perfect for someone like me who doesn't enjoy a lot of sugar.  

I used dried stevia leaves to make what is essentially a thick tea aka my simple syrup.  Stevia is a herb with naturally sweet leaves.  You may be familiar with it in the shape of little sugar packets which in my opinion don't taste as good as the real deal because they only use the extract, not the whole leaf.  Plus, stevia leaves are easy to find at your local herb store or online here.  It gives you all the sweetness of sugar without the calories.

I particularly love to use this in lemonade so I can enjoy lots of this perfect summertime drink without worrying about sugar overload.  It's also great in margaritas or other drinks that require a little sugar to balance out the tartness of citrus.  Be warned though, some say that one tablespoon of dried stevia is the equivalent of one cup of sugar in sweetness--so a little really does go a long way!  Some people prefer to grind up the leaves and sprinkle them into their recipes, but I prefer this tea-like steep because it is less messy for mixing and easy to have on hand.

Ingredients:

1/4 cup dried stevia leaves

1 cup boiling water

Pour hot water over herbs and let steep until mixture is cool.  Then pour liquid through a strainer into a mason jar.  Store for a few weeks in fridge.  Makes about 1 cup.  Enjoy!

image.jpg

Enchantment Learning & Living is an inspirational blog celebrating life’s simple pleasures, everyday mysticism, and delectable recipes that are guaranteed to stir the kitchen witch in you. If you enjoyed what you just read and believe that true magic is in the everyday, subscribe to my newsletter below for regular doses of enchantment. Want even more inspiration? Follow me on Instagram, Facebook, Pinterest, and Twitter. Here’s to a magical life!

Easy Coconut Body Butter

One ingredient.  Under ten minutes to make.  Silky soft skin as a result. Need I say more? I stumbled across this body butter recipe from Living the Nourished Life on Pinterest and immediately had to try it.  You know I love making my own body butters already because they are much more nourishing for your skin than traditional lotions (even organic ones that like to sneak in preservatives).  Plus, they feel positively luxurious! 

As easy as my body butter recipes are, I don't always have the energy to wait for beeswax to melt and then whip up my oils and other ingredients--especially this time of year when I am in an end-of-term-grading crunch. And as much as I look forward to my rich mojito body butter after a day in the sun, I find myself needing a lighter day-to-day moisturizer now that it is warmer out.  Enter this decadent and easy to make coconut body butter.

You simply whip up solid coconut oil until it is nice and frothy like whipped cream; this ensures that when you slather the butter on your body, it quickly absorbs into your skin, rather than leaving an oily residue.  You can add essential oils to it, but I find I like to preserve the gentle perfume of coconuts--feels so summery and festive!

Ingredients:

1 cup organic coconut oil

Place solid coconut oil in mixing bowl--don't melt the oil or it will not whip.  Using a handheld mixer, whip coconut oil for 6-8 minutes, or until oil is frothy like whipped cream.  Transfer to a small mason jar or other airtight container and store indefinitely in a cool, dry place.  To use, simply apply to skin post-bath in small amounts.  Makes about 1 1/2 cup.  Enjoy!

Enchantment Learning & Living is an inspirational blog celebrating life’s simple pleasures, everyday mysticism, and delectable recipes that are guaranteed to stir the kitchen witch in you. If you enjoyed what you just read and believe that true magic is in the everyday, subscribe to my newsletter below for regular doses of enchantment. Want even more inspiration? Follow me on Instagram, Facebook, Pinterest, and Twitter. Here’s to a magical life!

All-Purpose Cleaning Spray

With Earth Day around the corner, I find myself thinking of all the super easy ways we can be eco-friendlier in our day to day routine, especially when it comes to cleaning our homes.  We often think that if we want to green our cleaning routines that we need to shell out a fortune on organic cleansers and other goods.  In reality, we can be good to our environment and our wallet by going back to basics.

This all-purpose cleaner does just that, using the anti-bacterial properties of vinegar to clean your home--a recipe I learned from my mom.  It can be used on everything from windows and bathroom sinks to the kitchen counter and floors.  I like to throw in essential oils into this mix, usually peppermint or lavender to soften the smell of vinegar.  What you're left with is a nice smelling all natural antibacterial cleaner that costs you under $1 a bottle. 

Ingredients:

1 cup vinegar

1 cup water

30 drops essential oil (optional)

Mix all ingredients in a spray bottle and shake until combined.  Enjoy!

Enchantment Learning & Living is an inspirational blog celebrating life’s simple pleasures, everyday mysticism, and delectable recipes that are guaranteed to stir the kitchen witch in you. If you enjoyed what you just read and believe that true magic is in the everyday, subscribe to my newsletter below for regular doses of enchantment. Want even more inspiration? Follow me on Instagram, Facebook, Pinterest, and Twitter. Here’s to a magical life!

5 Cocktails to Cure Spring Fever

If you're anything like me and my fellow teachers (and our students!), you're feeling a little spring fever creeping into your day to day.  It's so lovely outside--something the tall glittery-green aspen trees outside the floor-to-ceiling windows in one of my classrooms remind me.  Then there is the sunlight, that ephemeral gentle kiss of golden splendor that just begs for you to pause a moment under its touch.  Who needs to grade papers when your garden is calling to you?  (Answer: me, but if I get my papers done soon enough, I can ease the throbbing in my green thumb.)  Can't those lesson plans wait in lieu of frolicking outside?  (Answer: no, class is in twenty minutes.) 

Fortunately, there is an antidote to the spring fever that clouds your brain with carefree longings in the midst of the end-of-semester grind--several in fact.  And yes, they come in the form of cocktails, those perfectly crafted restorative liquors that were once, in truth, used for healing minor ailments from ill-humor to stomach aches.  So why not use them to cure a little spring fever?  These cocktails whipped up in my own kitchen are for anyone who needs a little fun after the work-week, not just teachers. 

The prescription is easy: Take one of the below cocktails and mix with a cloudless evening, great company, and good conversation.  Also pairs well with a well-groomed backyard or garden nook.  Repeat as necessary.  Caution: Extreme relaxation and enjoyment may occur. 

1. 3 Citrus-Ginger Gin Fizz

2. Spritz Cocktail

3. Coconut Water-Kiwi-Lime Cocktail

4. Lavender Gimlet

5. Grape & Lime Gin Tonic

Enchantment Learning & Living is an inspirational blog celebrating life’s simple pleasures, everyday mysticism, and delectable recipes that are guaranteed to stir the kitchen witch in you. If you enjoyed what you just read and believe that true magic is in the everyday, subscribe to my newsletter below for regular doses of enchantment. Want even more inspiration? Follow me on Instagram, Facebook, Pinterest, and Twitter. Here’s to a magical life!

Spring Bath Bombs

Have I mentioned I love bubble baths?  Oh yeah, only like A MILLION times!  These bath bombs are a perfect way to indulge in the glories of spring and give yourself (and your loved ones!) a little TLC.  The citric acid removes dead skin cells, brightens skin, and gives it an overall glow, while the baking soda acts as a detoxifier and softener.  The coconut oil moisturizes and replenishes your skin. 

image.jpg

Seeing as it is spring, I chose to use essential rose and lavender oils and flower buds in my bombs; I went all out and used Easter egg cupcake molds (see picture above) to give them a festive flair for gift giving.  If you don't want to get fancy with the molds, you can hand form your bombs or use regular muffin tins to shape them (see picture below).  Just make sure you keep tins you use for DIY beauty treats separate from those you bake with.  You can also omit the flower buds in your mix if you don't want them floating around in your bubble bath.  Personally, I like it! 

image.jpg

Finally, as you all know, I like to keep my ingredients as earth-friendly and organic as possible, so I used I used beet powder and a blue mineral powder for the coloring from my local herb store--but you can find them online by clicking on the links above.  The beet powder gives off a pink hue, perfect for my rose bath bombs, and a slightly fruity scent.  The blue mineral dye adds a soft tint to my lavender bombs.   Remember a little goes a long way with these tints so use them sparingly to avoid potential staining (which might happen if using the beet powder in large quantities, like over 1/2 cup for this recipe, which is way more than anyone should ever use).

Ingredients:

2 cups baking soda

1 cup citric acid

4 teaspoons coconut oil

1/8 cup water (in spray bottle)

100 drops essential oil (I used lavender and rose) of choice

1 teaspoon coloring of choice (optional)

1/4 cup dried flowers (I used lavender and rosebuds) of choice (optional)

Combine all dry ingredients in a bowl and mix thoroughly, being careful not to raise too much dust.  Then add in coconut oil and essential oil of choice and mix thoroughly with hands, making sure that oil is evenly distributed throughout mix.  Here comes the tricky part: adding the water.  You need the spray bottle to ensure that you aren't adding too much water at once otherwise your bath bombs will begin to prematurely fizz. 

Going slowly, spray water into the bowl, stirring completely as you go until it is damp but not soaking wet.  You will probably not use all the water in your spray bottle.  You can test the readiness of your mix by squeezing together a handful of your mix and seeing if it sticks--if it does, you can go ahead and place it in molds.  If not, you'll need more water.  Once you have placed the mix into molds or hand shaped it into balls; you can let your bath bombs air dry for at least two hours or up to overnight.  Remove from molds (if using) and store in a dry place.  Makes about 9 bath bombs.  Enjoy!

Enchantment Learning & Living is an inspirational blog celebrating life’s simple pleasures, everyday mysticism, and delectable recipes that are guaranteed to stir the kitchen witch in you. If you enjoyed what you just read and believe that true magic is in the everyday, subscribe to my newsletter below for regular doses of enchantment. Want even more inspiration? Follow me on Instagram, Facebook, Pinterest, and Twitter. Here’s to a magical life!

DIY Seed Bombs

Nothing says spring like planting seeds or enjoying the beauty of bright flowers splashed across your backyard.  There is no better way to enjoy both delights than with these super easy seed bombs. What's a seed bomb, you might ask?  It's just what it sounds like: a ball of dirt and seeds that you can throw anywhere in your garden.  They make lovely gifts for spring celebrations like Easter--better than sugary confections.  They are a gentle way of bringing beauty to the lives (and yards!) of those you love. 

I used a mixture of organic flower seeds that would attract butterflies in my seed bombs because my little niece is in love with butterflies right now--and bright flowers.  Now she can have both in her backyard!  You can feel free to use any kinds of flower seeds you would like, however.  You can find the red clay at your local herb store or here (it's the same stuff you would use for a face mask).  Go easy on the water--just mix in a little at a time until the dirt and seeds are just wet enough to form balls otherwise you end up with soupy seed-sprouting mud.

Ingredients:

1 cup red clay

1/2 cup soil

1/4 cup seeds

Approximately 1/4 cup water

Mix all dry ingredients in a bowl and slowly, one tablespoon at a time, add the water until the mixture is just wet enough to form balls.  Then roll blend into one inch balls and let rest on a drying rack overnight.  Make sure there is plenty of air circulation--you want the dirt to dry or else the seeds will begin to sprout!  Makes about 9 seed bombs. 

image.jpg

Enchantment Learning & Living is an inspirational blog celebrating life’s simple pleasures, everyday mysticism, and delectable recipes that are guaranteed to stir the kitchen witch in you. If you enjoyed what you just read and believe that true magic is in the everyday, subscribe to my newsletter below for regular doses of enchantment. Want even more inspiration? Follow me on Instagram, Facebook, Pinterest, and Twitter. Here’s to a magical life!

Aphrodite's Sugar Scrub

Valentine's Day is a celebration of the love in your life--and not just romantic kind.  It's about sharing your gratitude for the people who make your day a little brighter and a little sweeter.  What better way to honor this love than by giving them this sugar body scrub to shake off the winter blahs?

Full of cinnamon and roses--long considered natural love potions--this scrub inspires us to invoke the divine Aphrodite and to relish the simple hedonism of a long bubble bath (maybe with a buddy!), pampered skin, and a rosy outlook on life.  Pair it with my Aphrodite's Bath Salts, and you've got a match made in heaven!

Ingredients:

1 cup organic sugar

1 cup olive oil or coconut oil

1 tablespoon cinnamon

1/4 cup rose petals

30 drops cinnamon essential oil

30 drops rose oil or rose water

10 drops clove oil

Mix all ingredients in a bowl and store in a mason jar or other airtight container.  Makes about 1 cup.  Enjoy!

Enchantment Learning & Living is an inspirational blog celebrating life’s simple pleasures, everyday mysticism, and delectable recipes that are guaranteed to stir the kitchen witch in you. If you enjoyed what you just read and believe that true magic is in the everyday, subscribe to my newsletter below for regular doses of enchantment. Want even more inspiration? Follow me on Instagram, Facebook, Pinterest, and Twitter. Here’s to a magical life!

Aphrodite's Bath Salts

With Valentine's Day around the corner, you might be thinking about what to get for those special someones in your life beyond a glitter coated heart-shaped card, a box of chocolates, or a bouquet of roses--all wonderful, natch, but sometimes it doesn't hurt to shake things up.   And let's be honest, they've probably already used the treats you made them for the holidays! I like to think of Valentine's Day as a time when we can try a little tenderness, as the song goes.  That includes pampering the people that fill your corner of the world with love, light, and happiness. 

And who knows? If you want to treat an extra special someone to some TLC, the aphrodisiacs mixed into these bath salts might just make things a little more interesting.  The clove and cinnamon oil are antibacterial and add a warming energy to your bath, while the rose petals bring a touch of romantic glamor as well as skin-softening and toning qualities.  Adding rose oil and powdered cinnamon just takes this delectable soak over the top!

Ingredients:

1 cup Epsom salts

1/4 cup olive oil or coconut oil

1 tablespoon cinnamon

1/4 cup rose petals

30 drops cinnamon essential oil

30 drops rose oil or rose water

10 drops clove oil

Combine ingredients in a bowl until thoroughly mixed.  Store in an airtight container indefinitely.  Makes about 1 cup.  Enjoy!

Enchantment Learning & Living is an inspirational blog celebrating life’s simple pleasures, everyday mysticism, and delectable recipes that are guaranteed to stir the kitchen witch in you. If you enjoyed what you just read and believe that true magic is in the everyday, subscribe to my newsletter below for regular doses of enchantment. Want even more inspiration? Follow me on Instagram, Facebook, Pinterest, and Twitter. Here’s to a magical life!

Best Hits: Kitchen Conjuring

As I wind down my year of daily blogging, I find myself reflecting on these moments of everyday magic and simple pleasures, of delicious experiences, feelings, or life lessons distilled through words into living memories.  Today, as I find myself once again tinkering in the kitchen, I realize how much I turn to the stove, the fridge, the pantry for inspiration. In honor of this, I am sharing some of the most memorable posts on the magic we conjure in the kitchen:

1. On Eggs & Ham

2.  Under the Influence of M. F. K. Fisher

3.  On Making Limoncello

4.  On Kitchen Sinking-It

5. On Grocery Shopping

6.  On Pasta Making

Enchantment Learning & Living is an inspirational blog celebrating life’s simple pleasures, everyday mysticism, and delectable recipes that are guaranteed to stir the kitchen witch in you. If you enjoyed what you just read and believe that true magic is in the everyday, subscribe to my newsletter below for regular doses of enchantment. Want even more inspiration? Follow me on Instagram, Facebook, Pinterest, and Twitter. Here’s to a magical life!

Biscochitos

Christmas in New Mexico is nothing without biscochitos, shortbread-like cookies laced with anise seeds and spices.  I've been making these treats for my family for as long as I can remember; my trusty guide was always a slim bound cookbook called Cocinas de New Mexico, published by our local electrical company (the recipes are written by the employees and the proceeds go to paying the utility bills for struggling families).

Naturally this means I've developed my own spin on this cookie over the years, swapping out the traditional brandy for local Silver Coyote Whiskey (a magical twist discovered when I was making cookies last year and found myself out of brandy but with plenty of my favorite tipple from Santa Fe Spirits--they also have a wickedly good gin). 

I like to use whole wheat flour and quality organic ingredients--they make all the difference for flavor and health--and I mix more anise than the traditional recipe calls for.  But you know me, I'm a spice whore and like it that way, so much so that I put in cinnamon and ginger in my batter--also my own twist. 

Ingredients:

For cookies:

1 cup shortening

3/4 cup sugar

2 teaspoons anise seeds

1 egg

1 & 1/2 cups all-purpose flour

1 & 1/2 cups whole wheat flour

1 & 1/2 teaspoons baking powder

1/2 cup Silver Coyote Whiskey or brandy of your choice

1/4 cup water (if needed)

1 teaspoon cinnamon

1/2 teaspoon ginger

For cinnamon-sugar dusting:

1/4 cup sugar

1/2 tablespoon cinnamon

Preheat oven to 350 degrees.  Cream shortening, sugar, anise, cinnamon, and ginger in mixing bowl.  Add egg until combined.  Mix together remaining dry ingredients in a separate bowl.  Alternate adding dry ingredients and whiskey to your mix until everything is combined.  You might need to add a little water for the dough to complete take shape after that.  If that is the case, add a few tablespoons of water at a time until you get desired consistency, a semi-firm dough that you can easy roll on a floured surface.

On a floured surface, roll out dough to about 1/4-inch thickness.  Using cookie cutters, cut dough into festive shapes and placed on unlined cookie sheet.  Bake in oven for about 10 minutes or until cookies are lightly browned.  While they cook, combine remaining cinnamon and sugar and set aside in a shallow bowl.  Let cool for about two minutes before dipping into cinnamon-sugar mix.  Makes about 2 1/2 dozen.  Keep for up to one week.  Enjoy!

Enchantment Learning & Living is an inspirational blog celebrating life’s simple pleasures, everyday mysticism, and delectable recipes that are guaranteed to stir the kitchen witch in you. If you enjoyed what you just read and believe that true magic is in the everyday, subscribe to my newsletter below for regular doses of enchantment. Want even more inspiration? Follow me on Instagram, Facebook, Pinterest, and Twitter. Here’s to a magical life!

Sugar Rum Cherries

No, I didn't really mean to write "Sugar Plum Fairy," the title of the well-known ditty that makes up part of the Nutcracker Suite.  I'm actually referencing Duke Ellington's spin on this classic tune, which he titled, "Sugar Rum Cherry."   It's soft.  It's sweet.  It's smooth...and a little cheeky.  If you haven't heard it, you simply haven't lived! 

This song, along with the cherry and liquor stuffed chocolates that appear this time of year, inspired this dessert.  I marinate frozen dark cherries in rum or brandy, and amaretto then dip them in both white and dark chocolate.  What's not to like?  They are full of more flavor and less sugar (and other suspicious ingredients) than their store-bought cousins.  You can keep the liquor, too.  The cherry flavor gets infused into the mix, making a perfect after dinner digestif--it's even better with a splash of lime juice. 

Ingredients:

1 10 oz bag frozen organic dark cherries

2/3 cup rum or brandy

1/3 cup amaretto

1 cup melted white chocolate

1/2 cup melted dark chocolate.

Soak cherries in liquor mixture for at least one hour or up to overnight--the longer the soak, the boozier they will taste.  Remove cherries from liquid and pat dry with a paper towel.  Using a toothpick, dip each cherry into melted white chocolate and set on a baking sheet lined with parchment paper.  Then drizzle dark chocolate across your rows of white chocolate dipped cherries.  Place baking sheet in fridge and allow cherries to harden about 5 minutes.  Remove from baking sheet and store in a single layer in a flat dish.  Eat within one week.  Enjoy!

Enchantment Learning & Living is an inspirational blog celebrating life’s simple pleasures, everyday mysticism, and delectable recipes that are guaranteed to stir the kitchen witch in you. If you enjoyed what you just read and believe that true magic is in the everyday, subscribe to my newsletter below for regular doses of enchantment. Want even more inspiration? Follow me on Instagram, Facebook, Pinterest, and Twitter. Here’s to a magical life!

Bubble Bath Lover Gift Basket

It is a well-known fact that I love a good bubble bath.  I love it even more when I can soak for a good long while, drinking a cup of tea or glass of wine, and getting lost in a good book.  When the water cools, the tea (or wine) cup is empty, and the bubbles have all faded, I can seek consolation in homemade soap, body scrub, and lush body butter to finish off my decadent bath indulgence.

Over the years I have found that there are others like me.  We have even compared notes: to read or not to read? (Always read!) What brand of foaming bubbles creates maximum frothiness for the longest amount of time?  (The answer BTW is Everyday Shea Bubble Bath.)  Wine or tea?  (I tend to go both ways on this one, depending on my mood and the time of day.)  Whatever your stance on these all important big life questions, any bubble bath lover agrees that a gift basket stuffed with just-for-you bath time goodies will never go amiss!  I break my bubble bath gift basket into four parts: the literature, the beverage, the bath, and the aftermath pampering products:

1.  The Literature: Choosing the right book for your bath is like a science.  You want something you can get lost in, but also light enough to help you relax and wash away the worries of the week--no Tolstoy or Hugo here! A holiday themed cozy mystery like the one featured in the photo below works well for the cozy reader in your life, but you can also never go wrong with old pulp books or cheesy paperbacks with fun covers.  And stick with paperbacks--hardbacks are too nice to risk a dunk in the tub.


2.  The Beverage: This depends entirely on the type of bubble bather you are.  For the tea lovers, I stick with a small jar of a soothing herbal tea, like my Soothing Mint Tea or Winter Wellness Blend.  For the wine lover, you can include a half-bottle of wine and a pretty plastic wine glass in your basket (any bubble bath pro knows that a sturdy shatterproof glass is your safest bet when you want to indulge in the tub).

3.  The Bath: I love whipping up a mixture of my Weekend Head Start Bath Mix and including a little vial of my favorite bubble bath so that the receiver has all the makings of a nourishing bath ready to go.

4.  The Aftermath: These are the treats that your bath lover near then end of their soak, like nice soaps, scrubs, and body butters.  Stick to a scent theme on this one--you can check out my Holiday TLC Gift Baskets for ideas!

At the end of a long day, your favorite bubble bath pal (or buddy--who says bubble baths are meant to be taken solo?) will thank you for this thoughtful basket of treats!

Enchantment Learning & Living is an inspirational blog celebrating life’s simple pleasures, everyday mysticism, and delectable recipes that are guaranteed to stir the kitchen witch in you. If you enjoyed what you just read and believe that true magic is in the everyday, subscribe to my newsletter below for regular doses of enchantment. Want even more inspiration? Follow me on Instagram, Facebook, Pinterest, and Twitter. Here’s to a magical life!

Holiday TLC Gift Baskets

There is no gift more thoughtful than a basket full of treats, especially if those treats are homemade and about pampering the receiver.  Too often we overlook self-care during this busy season--which goes double for the festivity planners and organizers.  Why not treat the holiday elves responsible for all the holiday decorating and planning to a basket full of just-for-them goodies?

The best way to make a gift basket is to stick to a theme, like the Winter Solstice, Sugar & Spice, and Peppermint Hot Chocolate TLC Gift Baskets featured here.  I combine a nice range of treats, from scrubs to body butters, that the receiver can enjoy long after all the holly and mistletoe have been taken down.  If you really want to do up the baskets, you can throw in other little treats like a loofah, bubble bath, or holiday tea. 

1.  My Winter Solstice TLC Gift Basket includes Winter Solstice Body Butter, Pine & Charcoal Soap, and the ingredients to my Honey Eucalyptus Foot Soak packed into a mason jar.  Adorn your basket with sprigs of pine and a few pine cones and you've got the perfect gift for the nature lover in your life.

2.  This Sugar & Spice TLC Gift Basket includes an array of cinnamony treats like my Cinnamon Sugar Body Scrub, Orange Spice Body Butter and Soap, and a Pumpkin Pie Body Scrub.  Top with a festive colored bow and a bundle of cinnamon sticks and you've got the ideal gift for your favorite sweetie.

3.  Finally, my Peppermint Hot Chocolate TLC Gift Basket is for those chocolate (and mint!) lovers in your life.  You get to pamper them with Candy Cane Body Butter, and Peppermint Hot Chocolate Soap and Body Scrub.  Tie it all together with a white and red striped ribbon and throw in a few candy canes (or peppermint chocolates) and you've been put on your chocolate lover's nice list.

Enchantment Learning & Living is an inspirational blog celebrating life’s simple pleasures, everyday mysticism, and delectable recipes that are guaranteed to stir the kitchen witch in you. If you enjoyed what you just read and believe that true magic is in the everyday, subscribe to my newsletter below for regular doses of enchantment. Want even more inspiration? Follow me on Instagram, Facebook, Pinterest, and Twitter. Here’s to a magical life!

Pine & Charcoal Soap

I know this may look like a lump of coal, but it's really a lump of wintery goodness for those angelic souls on your 'nice' list.

This soap gets its coal color from activated charcoal, one of those all-around wonder ingredients like baking soda.  I use it for everything from making my own homemade mascara or adding it to cocktails for a gothic touch!   Many people take it internally to help with bloating or apply it to bug bites to reduce swelling and suck out poison.  See what I mean?  Wonder product.

This activated charcoal is also a massive detoxifier and purifier which makes it great for your skin especially when cold weather and other elements wear it down.  The crisp pine scent is reminiscent of a wintery wonderland and acts as an antibacterial and anti-inflammatory agent.  I get my shea butter soap base from amazon.com, but you can also find it in some health food stores--same goes for the activated charcoal.  This soap makes a great gift for that special someone--your mountain man or earth woman--who likes a good homemade self-care product without super sweet scents.

Ingredients:

1 lb shea butter soap base

60 drops pine essential oil

1 heaping tablespoon activated charcoal powder, sifted

Chop shea butter soap base into half inch chunks and place in a microwave-safe bowl.  Heat for one minute and stir.  Then continue to melt base in the microwave in 20-second increments, stirring between each heating until liquefied, about 5 minutes.  Once the soap is melted stir in essential oil and sifted powder.  Pour into muffin tins and allow to set, about an hour.  (You can speed this up by placing them in the fridge for about 20 minutes).  Remove soap from molds by gently inserting a butter knife around the edges of the muffin tin until the soap pops out.  Wrap individually in plastic wrap or tuck multiples in an airtight container.  Store in a cool, dry place indefinitely.  Makes about 4 soaps.  Enjoy!

Enchantment Learning & Living is an inspirational blog celebrating life’s simple pleasures, everyday mysticism, and delectable recipes that are guaranteed to stir the kitchen witch in you. If you enjoyed what you just read and believe that true magic is in the everyday, subscribe to my newsletter below for regular doses of enchantment. Want even more inspiration? Follow me on Instagram, Facebook, Pinterest, and Twitter. Here’s to a magical life!