Enchantment Learning & Living Blog

Welcome to Enchantment Learning & Living, the inspirational space where I write about the simple pleasures, radical self-care, and everyday magic that make life delicious.

Green Fairy Cocktail

Halloween is a great excuse to whip up a fun seasonal cocktail.  Unfortunately, most of those drinks are saturated with super sugary neon hued gunk in the form of cheap schnapps and other liquors that have less to do with a quality cocktail and more to do with getting the right Halloween-y looking drink drowning in artificial syrups. Horrifying!

And yet this dilemma presented me with a perfect challenge: making festive cocktails that are made from quality ingredients.  Personally, my tastes in cocktails run towards the classics--martinis, gimlets, old fashioneds--simple drinks with a few superb ingredients.  Now all I needed was appropriately spooky or mercurial twists on these standards. So, my challenge began.

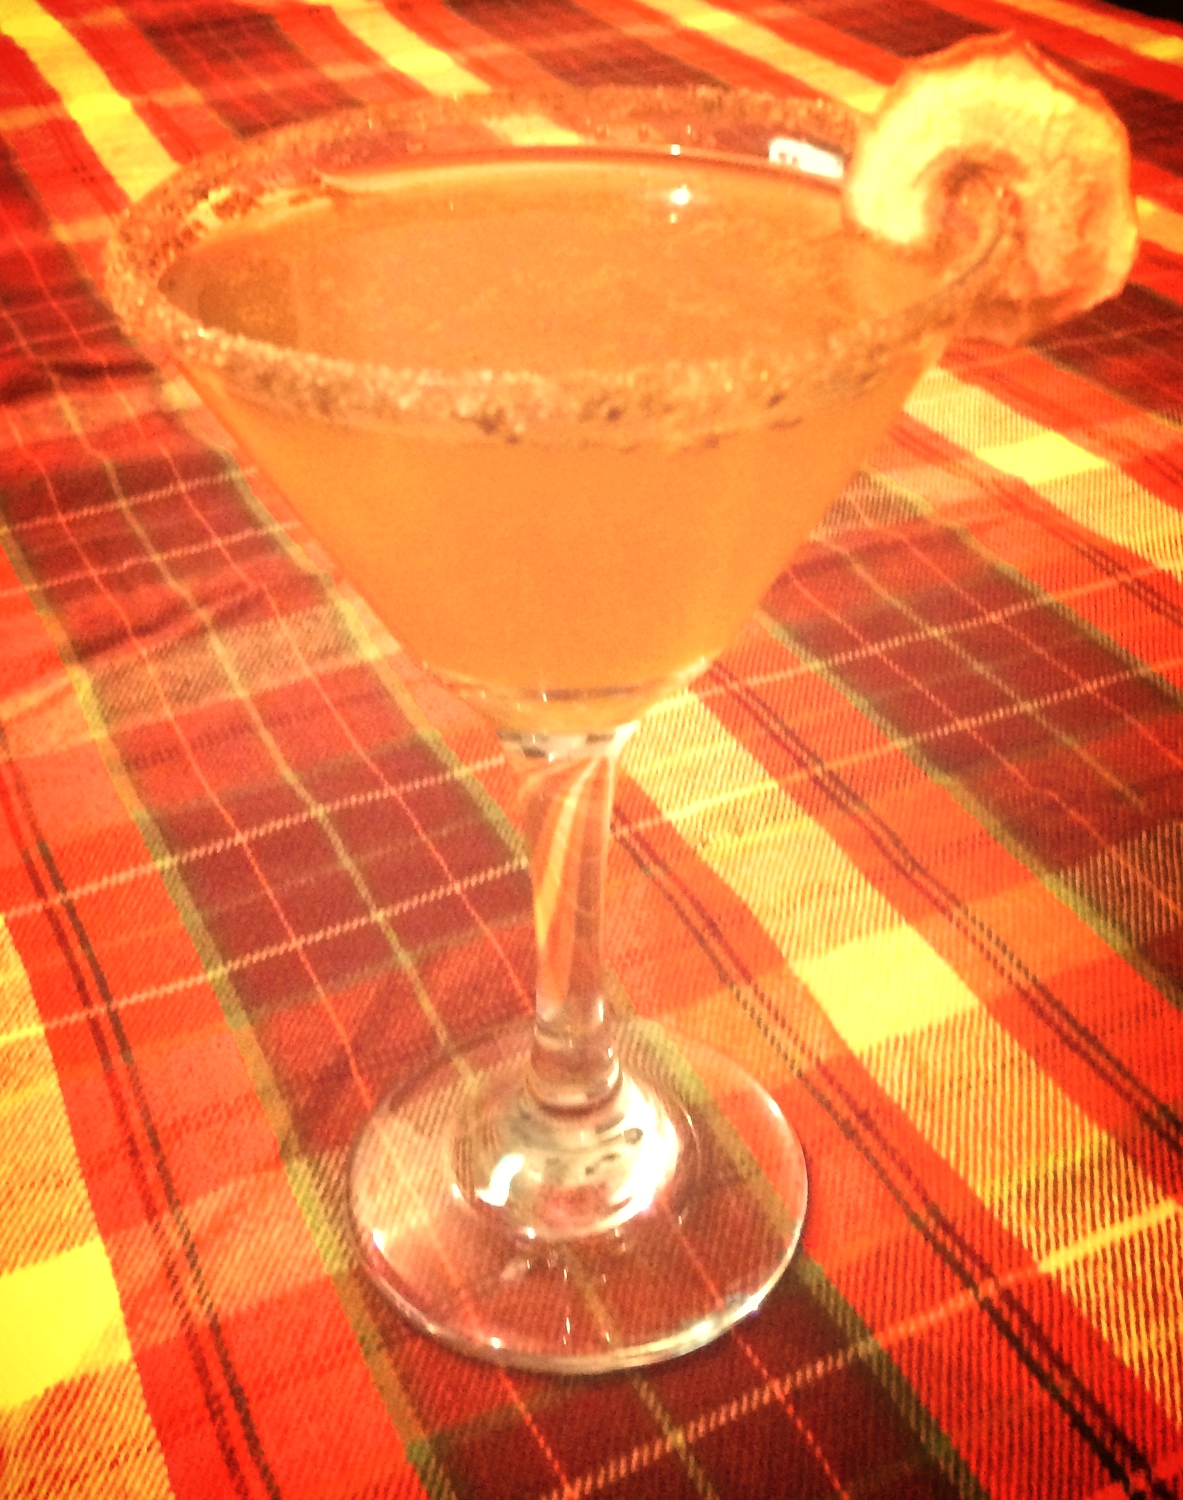
The result?  This absinthe-based cocktail, for starters.  Absinthe, once banned in America for the purported insanity-causing properties of wormwood (one of its chief ingredients), struck me as the perfect base for a Halloween-inspired cocktail.  An insanity causing liquor with a shady history?  The sipper of choice among artists and writers ever in search of that elusive muse?  The green fairy that is said to emerge when this high-proof liquor is diluted with water and turns a cloudy green color?  Sounds to me like the perfect foundation for an inspiration inducing potion that mimics the seductive playfulness of the Green Fairy herself.

I used Mephisto Absinthe, rich with not only anise but herbs like sage and cinnamon.  These other herbs round out the licorices flavor so that it is not overly cloying.  The use of gin contributes to the herbaceous note of this cocktail, and the lime juice adds a pop brightness.  What you end up with is a faintly green glass of goodness--and maybe a little creative inspiration for that next project of yours.

Ingredients:

1/4 oz absinthe

2 oz gin

3/4 oz fresh lime juice

2-3 dashes grapefruit bitters (optional)

ice

In a shaker, combine ingredients and shake vigorously.  Let sit for half a minute, long enough for the ice to melt and dilute potency of the absinthe.  Pour into your cocktail glass and enjoy!  Serves one, so double the recipe and see if you and your friend have any other green fairy sightings!

Enchantment Learning & Living is an inspirational blog celebrating life’s simple pleasures, everyday mysticism, and delectable recipes that are guaranteed to stir the kitchen witch in you. If you enjoyed what you just read and believe that true magic is in the everyday, subscribe to my newsletter below for regular doses of enchantment. Want even more inspiration? Follow me on InstagramFacebookPinterest, and Twitter. Here’s to a magical life!

Comment
Share

Autumn Harvest Tea Blend

Who doesn't love a hot cup of tea on a chilly fall day?  There's nothing like wearing your favorite fall sweater, snuggling under a nice knit blanket, and sinking into a good book over a fat mug of tea.  Or let's not forget the pleasures of a refreshing brew to start your work day, as you breathe in the crisp air, enjoy the gorgeous fall foliage, and take that first sip of goodness.

My particular favorite hug-in-a-cup this time of year is my Autumn Harvest Blend, full of the rich spices you associate with the season and the gentle sweetness of apple bits and chamomile.  I love this fruit and herb combo because of chamomile's apple-like fragrance pairs nicely with the earthiness of dried apples. The rose hips add another dash of fruitiness and host of nutrients. 

Ingredients: 

1 cup chamomile

1/2 cup dried apple bits

1/2 cup cinnamon chips

1/4 cup dried ginger

1/8 cup dried rose hip bits

Combine ingredients in a bowl. Store in a mason jar in a cool dry place. To use, add one heaping tablespoon of blend to 8 ounces hot water and steep for 3-5 minutes. Enjoy! 

Health properties of ingredients:

Apple: contains vitamins A,C, some B and potassium; good source of fiber.

Chamomile: anti-inflammatory; sedative; skin softening; all around body soother.

Cinnamon: antiseptic, aids digestion, calms nervous system, anti-inflammatory.

Ginger: soothes stomach pain; anti-inflammatory; aids digestion.

Rose hips: anti-aging; contains vitamins A, D, B, C, E, and K, iron, calcium, zinc, and other vital nutrients; promotes healing and boosts energy; antibacterial.

Enchantment Learning & Living is an inspirational blog celebrating life’s simple pleasures, everyday mysticism, and delectable recipes that are guaranteed to stir the kitchen witch in you. If you enjoyed what you just read and believe that true magic is in the everyday, subscribe to my newsletter below for regular doses of enchantment. Want even more inspiration? Follow me on InstagramFacebookPinterest, and Twitter. Here’s to a magical life!

Comment
Share

Apple Cider Margarita

Oh yes, I went there.  And I went one step further and published this with just enough time for you to get the ingredients for your weekend cocktail!  This margarita came about last Friday when I found myself in need of one, but with not enough limes to do the job; I only had 1/2 oz of freshly squeezed lime juice, to be exact. 

Cut to me eyeing my newly purchased jug of local apple cider.  A plot was hatched.  Why couldn't I take the autumnal bliss that is cider and marry it with my traditional Friday night margarita?  I did just that and was rewarded with a wonderfully smokey (from the tequila), tangy (from the lime and cider) sweet (from the apples and triple sec) concoction.  I'm addicted.  But there's only one way to see if you will be too--try it out!

Ingredients:

1.5 oz tequila

1/2 oz triple sec (optional)

3 oz fresh apple cider

1/2 oz lime juice

ice

Combine all ingredients in a glass and stir until combined.  Serves one.  Drink immediately.  Better yet, double the recipe and invite a friend over to enjoy this blissful fall cocktail on your porch!

Want more liquid autumn? Try my Cinnamon Apple Cocktail.

Enchantment Learning & Living is an inspirational blog celebrating life’s simple pleasures, everyday mysticism, and delectable recipes that are guaranteed to stir the kitchen witch in you. If you enjoyed what you just read and believe that true magic is in the everyday, subscribe to my newsletter below for regular doses of enchantment. Want even more inspiration? Follow me on InstagramFacebookPinterest, and Twitter. Here’s to a magical life!

Comment
Share

Nettle Tea

The nettle leaf is one of those plants, like the dandelion, that is often overlooked as a useless weed but is really one of the most amazing plants with health benefits out there. The tea it produces is my new favorite daily cup of goodness.  I recently fell in love with the brew again after I found myself struggling with allergy symptoms last month.  My sister-in-law, an amazing healer, told me to try drinking nettle tea.  Luckily, I had some on hand.  After a few cups of the herbal steep, I was feeling fit as a fiddle again! In fact, I realized that my symptoms only showed up when I had stopped drinking my nightly mint, dandelion, and nettle leaf tea blend.

Drinking nettle tea daily is worth it just to prevent any cold or allergy symptoms, but I also drink it because it boosts your immune system; relieves hypertension, bloating and cramps; reduces inflammation and allergy symptoms; contains vitamins A, C, D, and K, iron, and other important vitamins and minerals; builds energy; and even acts as a mild diuretic.  What a power-packed herb!  In fact, the only downside to this plant is that it might cause irritation (mild rash or upset stomach) for a few people, so it's a good idea to try just a little tea at first before committing to a cup a day.  That said, I've never had any adverse effects from drinking this tea. 

Ingredients:

Nettle Leaf

To brew, use one tablespoon per 8 oz hot water.  Steep for 3-5 minutes.  Can re-steep leaves. Enjoy!

Enchantment Learning & Living is an inspirational blog celebrating life’s simple pleasures, everyday mysticism, and delectable recipes that are guaranteed to stir the kitchen witch in you. If you enjoyed what you just read and believe that true magic is in the everyday, subscribe to my newsletter below for regular doses of enchantment. Want even more inspiration? Follow me on Instagram, Facebook, Pinterest, and Twitter. Here’s to a magical life!

Comment
Share

Cinnamon-Apple Cocktail

Fall is officially here!  What better way to celebrate than to whip up an autumnal cocktail?  You'll get to learn about my Apple Cider Margarita later this week, but perhaps you are looking for something a little more sophisticated for Saturday or Sunday night...sophisticated or bourbon-y.  This cocktail tastes like autumn in a glass: spicy cinnamon, tart apples, caramel-like bourbon.  Bliss!

The surprise ingredient in this drink is apple cider vinegar.  I tiny splash of it adds brightness and contrast to the drink, preventing it from being overly sweet.  But be careful: more than a hint of the vinegar and your drink will be too tart.

If you want to give it a little extra sparkle, you can garnish it with a cinnamon-sugar rim and a dried apple piece as pictured here.  Simply mix together equal parts cinnamon and sugar (about 1/8 cup total) in a shallow bowl or plate; next dip the rim of your cup in water and then place it in the cinnamon-sugar mixture.  Finally, slice a dried apple piece almost halfway through and perch on the side of your glass.

The drink, of course, tastes equally delicious without this fancy wrapping!

IMG_5507.JPG

Ingredients:

dash of cinnamon

1.5 oz bourbon (I used Maker's Mark)

3 oz fresh apple cider

1/4 teaspoon apple cider vinegar

ice

Prepare garnish on glass, if you want to make your cocktail hour an event.  Then place a dash of cinnamon at the bottom of your empty glass.  Combine the remaining ingredients in a shaker and shake until combined.  Strain shaker over cocktail glass until empty. Enjoy!  Serves one--so double the batch and drink it with a special friend while enjoying the fading autumn light for the evening.

Enchantment Learning & Living is an inspirational blog celebrating life’s simple pleasures, everyday mysticism, and delectable recipes that are guaranteed to stir the kitchen witch in you. If you enjoyed what you just read and believe that true magic is in the everyday, subscribe to my newsletter below for regular doses of enchantment. Want even more inspiration? Follow me on Instagram, Facebook, Pinterest, and Twitter. Here’s to a magical life!

Comment
Share

Teacher's Survival Tea Kit

I love my tea--brewing it, drinking it, blending my own healing mix--all of it!  Of course, this should come as no surprise, considering how much I write about it; for those of you who see me beyond the writer's desk, you know I am never without a good cup or thermos of this magical elixir.  And I love teaching, too---the lesson plans, the classes, yes, even the grading.  But most of all, I love the way tea helps me stay refreshed and nourished while tackling those important teacher duties, especially this time of year when the first term papers beginning to rolling in.  

I look to my herbal tea to revive me in (healthier) ways that caffeine or sugar just can't, to sooth me to sleep at night, or to keep me from getting that bug going around the office...the list goes on and on.  Tea is my personal toolkit for self-care during a busy workday.  So here I offer you three of my favorite teas every tea-lovin' teacher should have in her stash to help her plow through those first round of papers or take a breather between classes.

1. Warrior Tea Blend: Teachers are warriors of the mind, right?  Whatever your answer to that, this warrior blend is chock-full off nutrient dense herbs to keep your body nourished between meals while you go from class to class.

2.  Winter Wellness Tea: This tea is the miracle cold and allergy prevention blend to drink the very second you think you might be coming down with something.  The elderberries, especially, ease congestion while the tulsi helps your body adapt to stress. 

3. Sleepy Time Tea:  A teacher needs her shut-eye if she's going to be a grading wizard and look good doing it, so this tea helps you unplug from your day and wind down for an evening of sweet dreams.

What teas do you drink to keep going through the day?  What else is in your Teacher Survival Kit?

Enchantment Learning & Living is an inspirational blog celebrating life’s simple pleasures, everyday mysticism, and delectable recipes that are guaranteed to stir the kitchen witch in you. If you enjoyed what you just read and believe that true magic is in the everyday, subscribe to my newsletter below for regular doses of enchantment. Want even more inspiration? Follow me on Instagram, Facebook, Pinterest, and Twitter. Here’s to a magical life!

Comment
Share

Limoncello Spritz Cocktail

Most of last week was spent waxing poetic about the glories of limoncello--making it, drinking it, allowing it to flood me with the golden memories of my trip to Italy.  I also promised you a recipe for the alluring elixir, assuming you don't always want to drinking it as is, perfectly chilled in a small sipping cup.  This cocktail is a variation of the Italian spritz, which uses a bitter orange liquor, Aperol, as a sparkling wine enhancer.  Here I swap out the Aperol with my limoncello for a light lemony bubbly drink perfect for your next celebration.  As a bonus, this drink tastes marvelous in any cup, including this plastic cup pictured here used when toasting to my sister and her husband's new house.  There was no furniture or even proper dishes in yet, only some takeout lunch, a few blankets for a makeshift indoor picnic on the wood floors of their living room, and of course, this bubbly drink to welcome them to their new home.


Ingredients:

1.5 oz (1 shot glass full) limoncello

5 oz (about 3-4 shots) of a dry sparking white wine

1.5 oz (1 shot) sparkling water

Ice (optional)

Pour limoncello into the bottom of a glass.  Add sparkling wine and sparkling water.  Add ice if desired--sometimes I put it in, sometimes I don't.  Serves one (so double the recipe and invite another limoncello lovin' friend to join you!).  Pairs well with a sunny Capri state of mind and a lovely patio garden.  Enjoy!

Enchantment Learning & Living is an inspirational blog celebrating life’s simple pleasures, everyday mysticism, and delectable recipes that are guaranteed to stir the kitchen witch in you. If you enjoyed what you just read and believe that true magic is in the everyday, subscribe to my newsletter below for regular doses of enchantment. Want even more inspiration? Follow me on Instagram, Facebook, Pinterest, and Twitter. Here’s to a magical life!

Comment
Share

Mama Love Pregnancy Tea Blend

I am happy to announce that in just a few short months, I will be the proud auntie to a little baby niece!  I can't wait to do all the things good aunties do, like fuss over her as a baby, take her to high tea when she is old enough, and teach her the value of good books and polka dot dresses.  Even as I write this, I am in the process of knitting a hot pink blanket for her so that she knows how loved she is--loved even before she came into this world!

Of course, it's not all about the cute baby.  In fact, my mom and I have been doing quite a lot of girl bonding things to enjoy this pregnancy process with my sister and the whole family is helping her and her husband move into their new home this weekend.  So it has been lots of love and excitement all around! 

And yet we mustn't forget the needs of the mother.  Her body is changing rapidly as it adjusts to the new life it carries and it is important to make sure she gets plenty of nutrients in her system--just as important as plenty of rest, exercise, and a healthy diet.  So in honor of my sister's pregnancy, I came up with this herbal pregnancy tea blend meant to give this new mama a little TLC. 

One thing to keep in mind is that when using herbs, it is always wise to consult your doctor and local herbalist about what herbs are safe for pregnant women.  Make sure to stay away from stimulating herbs like ginger because it can make the uterus overactive.  With this in mind (and a trip to my local herb store to consult with the experts), I stuck with nutrient dense herbs like alfalfa, rose hips, and raspberry leaf for this recipe to give my sister the extra energy and vitamin boost she needs. The mint leaves balance the grassy taste of the alfalfa while soothing the nerves and easing morning sickness. 

This is also a great tea for non-pregnant ladies who need a little nutrient boost.  The raspberry leaf on its own, especially, has long be considered a woman's herb, as it is good overall uterus health and contains a significant amount of magnesium which most women are deficient in (and which can be one of the causes of cramping).  My sister has been enjoying this blend all throughout her pregnancy; she likes the taste and loves that it nourishes both mother and child!

Ingredients:

1 cup Alfalfa Leaf

1/2 cup Peppermint leaf

1 cup Raspberry Leaf

1/2 cup Rose hips

1/2 cup Spearmint leaf

Blend all ingredients in a bowl and transfer to an airtight container.  Keep away from direct sunlight and heat.  To brew, use a heaping tablespoon per cup of hot water.  Add more tea per cup of water for a stronger brew.  Makes approximately 3 1/2 cups of tea.  Enjoy!

Health Properties of Herbs:

Alfalfa leaves: natural diuretic, improves digestion, rich in vitamins A, E, K, B, D, iron, magnesium, potassium, and sodium.

Peppermint: a cure-all herb for headaches, cramps, sore throat, and stomach aches.  

Raspberry leaf: rich in vitamins A, B, C, E, magnesium; tones uterus; relieves tension.

Rosehips: anti-aging; contains vitamins A, D, B, C, E, and K, iron, calcium, zinc, and other vital nutrients; promotes healing and boosts energy; antibacterial.

Spearmint: soothes nerves, motion sickness, along with the properties associated with peppermint; stronger flavor than peppermint.

Enchantment Learning & Living is an inspirational blog celebrating life’s simple pleasures, everyday mysticism, and delectable recipes that are guaranteed to stir the kitchen witch in you. If you enjoyed what you just read and believe that true magic is in the everyday, subscribe to my newsletter below for regular doses of enchantment. Want even more inspiration? Follow me on Instagram, Facebook, Pinterest, and Twitter. Here’s to a magical life!

Comment
Share

On Making Limoncello

It is your way of distilling sunshine in a bottle, of capturing the salty, bright air of Capri and the golden light of Tuscany.  It will forever be your first time in Florence, savoring the sweet lemony digestif at midnight on the Palazzo Vecchio, only half-believing that there you were in the heart of a city you had only ever read about.

IMG_0875.JPG

Now, as you peel your lemons, you think back to that first night and how smoothly that limoncello went down, a cool, clean tonic on your throat, the perfect antidote to a year of uphill climbs and dead ends.  The heaviness in you had lifted, carried away by the soft midnight breeze and kept away with the lively conversation of your late-night companions and the music floating across the piazza.  It took the bitter peel of a tart fruit and a long year and turned it into something soft, gentle, enjoyable. 

You do this now too--taking those seemingly unusable pieces and shaping them into something beautiful.  You work your way carefully around the lemon, making sure to shave off the outer skin but leave the too-bitter white flesh untouched; it will not do to let a pith-soured rind steep in your brew.  This elixir must be made up of light and fresh starts.

As the weeks pass and your mason jar, full of lemon peels and spirits, darkens to a rich golden hue, you consider the time it takes to make something worthwhile, to let it cure until it is ready to be finished off with sugar and water.  Remove the peels too soon, and you are left with a weak drink, more sugar than citrus; too long, and the fruit's oils overtake everything else, saturating your drink with the sharp taste of harsh moonshine.  No, the timing is everything and only the golden color of the concoction tells you it is ready.  It does not listen to fixed days or firm dates but arrives at perfection in its own time.

You admire your first batch of limoncello when it is complete, almost hesitant to take that first sip. But when you do, overlooking the quiet evening from the comfort of your patio, it is perfectly chilled and reminiscent of those long, slow nights in Italy, unrushed, unfettered, the taste of sweet lemon on your tongue.  The taste of present sweetness birthed from past bitter harvests.  

Enchantment Learning & Living is an inspirational blog celebrating life’s simple pleasures, everyday mysticism, and delectable recipes that are guaranteed to stir the kitchen witch in you. If you enjoyed what you just read and believe that true magic is in the everyday, subscribe to my newsletter below for regular doses of enchantment. Want even more inspiration? Follow me on Instagram, Facebook, Pinterest, and Twitter. Here’s to a magical life!

Small Batch Limoncello

Limoncello to me will always be my first night in Florence, sitting in an outdoor cafe on the Palazzo Vecchio at midnight with my mom and some artist friends drinking this delicious after dinner digestif.  This was my first time ever traveling abroad.  The drink became the embodiment of everything I love about travel: sweet and surprising, with a whisper of that country's everyday routine.  I spent the remainder of my trip in Italy finishing off my nights with this limoncello nightcap, as the Italians do to close out their meal.  The lightness of the lemons acts as a palate cleanser as digestive (where the drink title "digestif" comes from).  Even now, I love to enjoy a bit of limoncello on my patio using my favorite traditional shot-glass sized limoncello cups that I purchased from Capri. 

My mom and I enjoying some limoncello in Florence!

My mom and I enjoying some limoncello in Florence!

Imagine my delight when I found out how easy it is to make this drink!  This liquor is actually made from lemon peels rather than the fruit itself.  They soak in vodka or another clear spirit for anywhere from a week to a month and then the ensuing lemony spirit is mixed with water and sugar.  I let my peels steep for almost three weeks, as the longer you let the steep, the richer the lemony taste of the drink.  The important thing is to make sure that you use organic lemons since you need a chemical free peel to soak in your alcohol base.  This drink is best served chilled, usually after dinner or a big meal.  My family typically enjoys this on Sundays after our pasta feast.  You can also use it as a base for other cocktails--but more on that later. 

I prefer to make this in smaller batches because I like to play with the amount of lemon peels I put in each batch.  Since it is so easy to whip up, these small batches are ideal for this sort of experimentation.  I often use more lemon peels (almost double) than is traditionally called for in this recipe, because I like their brightness more than the sugary taste.  After trying limoncello all over Italy during my stay, I found that this drink ranged from light and crisp (ideal) to super syrupy (yuk!), so I made sure that my recipe stayed on the awesome side of this spectrum.  I also used raw organic sugar, making my final product come out darker than the traditional drink--more like a rich honey hue than a bright lemon yellow--but it still tastes delicious.  Don't discard the lemons after you peel them; save them instead for some homemade lemonade. 

Ingredients:

2 cups good quality vodka

1 3/4 cup water

1 1/4 cup sugar

6 lemons

Remove the peel from your 6 lemons using a vegetable peeler.  Make sure that you are getting the peel only and not the bitter pith. Place peels in a mason jar and pour vodka over them.  Seal jar and let sit for at least two weeks and no more than one month, shaking the jar periodically. 

Freshly peeled lemons with peels soaking in vodka...

Freshly peeled lemons with peels soaking in vodka...

...and same peel & vodka steep three weeks later.  Notice the darker hue that tells you it is ready.

...and same peel & vodka steep three weeks later.  Notice the darker hue that tells you it is ready.

Once the peels have steeped and you are ready to finish your limoncello, strain the alcohol from the peels and discard the peels.  Heat water and sugar in a saucepan on medium-hight until sugar dissolves, about 10 minutes.  Remove from heat and let cool completely.  Add sugar water to your alcohol and stir.  Store in two airtight mason jars and let cool complete in the fridge for at least four hours before drinking.  Lasts for up to one month in the fridge.  Makes about 4 cups of limoncello. Enjoy!

The final product, ready to chill in the fridge!

The final product, ready to chill in the fridge!

Enchantment Learning & Living is an inspirational blog celebrating life’s simple pleasures, everyday mysticism, and delectable recipes that are guaranteed to stir the kitchen witch in you. If you enjoyed what you just read and believe that true magic is in the everyday, subscribe to my newsletter below for regular doses of enchantment. Want even more inspiration? Follow me on Instagram, Facebook, Pinterest, and Twitter. Here’s to a magical life!

Comment
Share

On Writing in a Cafe

You find yourself in a crowded cafe.  It is the lunch hour.  The tables are packed with people and food and conversation.  There is the clattering of silverware and the hiss of freshly brewing coffee.  There is even the clack-clack-clack of your fingers whizzing across your keyboard. 

But that is what you came here for, after all.  Home would be too cozy today, luring you to your patio with birdsong and dappled sunlight, or to your bedroom where a stack of books awaits your eager gaze--if you enter the kitchen, you are lost for there would be no little recipe that you wouldn't be tempted to try.  So you put on a dress and headed to a place far noisier, but with significantly fewer distractions.

With this hustle and bustle, this active living swirling around you like a heady perfume, you are finally able to sink into yourself, to hear what it is you want to say today.  The buzz of everyday life becomes a soothing beat that allows you to slip into your own meditative thoughts, to breathe and be and write.

Soon, when you've released all the words in you for the day, spinning them out of your fingertips to your blog, when you've allowed your mind to settle and come back to the present moment, you look around and tune into the cafe noise again.  It has, if anything, only grown in fervor.  It is the little details you notice first: you cup of tea cooled beside you, the lemon slice lying discarded next to your cup; the smell of freshly baked bread; the new people occupying the table next to yours.  Your words begin to fade as the buzz of activity around you intensifies--it is time to rejoin this bustle of everyday life.

Enchantment Learning & Living is an inspirational blog celebrating life’s simple pleasures, everyday mysticism, and delectable recipes that are guaranteed to stir the kitchen witch in you. If you enjoyed what you just read and believe that true magic is in the everyday, subscribe to my newsletter below for regular doses of enchantment. Want even more inspiration? Follow me on Instagram, Facebook, Pinterest, and Twitter. Here’s to a magical life!

Summer Lovin' Rose-Lavender Tea Blend

Ahhhh...summer.  The time for long afternoons reading on your patio over a cup of tea--hot or iced.  The time when flowers are blooming and the bees are happily tickling your lavender buds in an attempt to collect and distribute pollen.  The time of year when I start craving light floral teas that mimic the bounty of the season.

One of my favorite blends that perfectly captures the season is my Summer Lovin' Rose-Lavender Blend, a tisane, or herbal tea, that combines rose petals, lavender buds, and raspberry leaves for a lady-like tea that is delicious either hot or cold--and perfect for any occasion, from an afternoon tea with the ladies to an impromptu iced tea in the shade after tending your garden. 

Yes, this tea is decidedly romantic with its fragrant rose and lavender perfume wafting from your cup.  The raspberry leaf binds these two flavors together with its own light black tea taste with floral undertones.  One cup of this is enough to make you see summer through rose colored glasses--if you aren't already!  As a bonus, these herbs are healing powerhouses--details below. 

IMG_4994.JPG

Ingredients:

1-part lavender

1-part rose petals

1-part raspberry leaf

Combine ingredients in a bowl and store in a mason jar.  To brew a perfect cup, use one tablespoon of blend per cup of boiling water.  Let soak for 5-7 minutes.  Enjoy!

Health properties of ingredients:

Lavender: a traditional nerve tonic and relaxant; antiseptic and antibacterial.

Raspberry leaf: rich in vitamins A, B, C, E, magnesium; tones uterus; relieves tension.

Rose petals: soothes skin; mild sedative and natural stress reliever; rich in vitamin C.

Enchantment Learning & Living is an inspirational blog celebrating life’s simple pleasures, everyday mysticism, and delectable recipes that are guaranteed to stir the kitchen witch in you. If you enjoyed what you just read and believe that true magic is in the everyday, subscribe to my newsletter below for regular doses of enchantment. Want even more inspiration? Follow me on Instagram, Facebook, Pinterest, and Twitter. Here’s to a magical life!

Comment
Share

Watermelon Cooler

Watermelon cooler (here made with basil, lemon, and lime) ready for an evening on the porch!

Watermelon cooler (here made with basil, lemon, and lime) ready for an evening on the porch!

When the sizzling temperatures of summer hit, I find myself craving watermelon juice.  Perhaps it is because of the great memories I have of drinking this delicately refreshing drink after many a hot yoga practice or because I always find myself with an extra watermelon in my fridge, but in either case, I find this watermelon cooler a go-to drink for the summer.  As I've gotten used to "juicing" watermelon, I've played around with this cooler, adding fresh lime juice to compliment the sweetness of the melon and even herbs, like basil or mint, to give the drink an extra kick.  This drink is great for overripe melons; while their texture might be grainy and less-than-appetizing, their juices are still plenty sweet and delicious.  This recipe also makes a great mocktail (or virgin cocktail) for those times you want a festive, hydrating drink.  If you want to make a full-fledged cocktail out of it (as I've been known to do come Friday night), you can simply add a shot of vodka to your drink.  Don't have limes on hand?  Swap them out with lemons.  It's pretty versatile!

Ingredients:

1 medium sized watermelon, the flesh scooped out, rinds discarded (about 4 cups)

3 limes, juiced (about 2-3 tablespoons)

3 tablespoons basil simple syrup (optional)

To make basil simple syrup, simply follow the instructions in my ginger simple syrup recipe, making sure to swap out the ginger with two cups of fresh basil leaves. 

Freshly pureed watermelon being poured into pitcher via a sieve.

Freshly pureed watermelon being poured into pitcher via a sieve.

Blend watermelon chunks in batches in a blender on medium speed until pureed.  Then pour pureed watermelon into a pitcher, using a sieve to separate the pulp from the juice.  Once all the juice is in the pitcher, stir in lime juice and taste.  If you want more of a lime taste, you can juice and add more.  Then, if you would like, add the basil simple syrup.  Enjoy!  Makes about 4 servings.


Enchantment Learning & Living is an inspirational blog celebrating life’s simple pleasures, everyday mysticism, and delectable recipes that are guaranteed to stir the kitchen witch in you. If you enjoyed what you just read and believe that true magic is in the everyday, subscribe to my newsletter below for regular doses of enchantment. Want even more inspiration? Follow me on Instagram, Facebook, Pinterest, and Twitter. Here’s to a magical life!

Comment
Share

Mojito Body Scrub

Nothing says summer like a nice, tall mojito--the mint and citrus cool you down after a day in the sun like nothing else.  Just the smell of mint and citrus evokes fantasies of sipping this perfect drink poolside while sunning myself!  But all the sunbathing leaves us with another important part of summer: self-care, especially for the skin.  I concocted this scrub in honor of both these things (self-care and mojitos), so my skin feels tingly fresh and ready for a day at the beach--or more realistically, my patio.  Use this with my mojito body butter and you've got a recipe for perfect skin all summer long!

Ingredients:

2 cups Epsom or sea salts or sugar (I used whatever I have on hand)

Mojito body scrub freshly packaged in a green mason jar--makes a great gift!

Mojito body scrub freshly packaged in a green mason jar--makes a great gift!

1 cup olive oil

20+ drops peppermint essential oil

20+ drops lemon essential oil

Mix ingredients in a bowl and transfer to a mason jar or other airtight container.  You can add more of the essential oils to get a more pungent smell.  Store in a cool, dry place for up to a month.  To use, scrub liberally over body after soaping down.  Avoid face.  Rinse.

Enchantment Learning & Living is an inspirational collection of musings touching on life’s simple pleasures, everyday enchantments, and delectable recipes that will guarantee to stir the kitchen witch in you.  If you enjoyed what you just read and believe that true magic is in the everyday, subscribe here.

Want even more inspiration to make your dream life a reality?  Follow me on Facebook, Pinterest, and Twitter.  Thanks for following!

Comment
Share

Mojito Body Butter

Fresh body butter ready to be stored.

Fresh body butter ready to be stored.

Recently, I ran out of my stash of homemade body butter and made do for a few weeks with store-bought lotion--what a waste!  My skin was dryer than dry and lost that luscious softness that can only be achieved with my own body butters.  Even when I switched to plain old coconut oil in favor of the lotion, my skin felt greasy more than hydrated.  So it was with great relief when I finished school that I could set aside an afternoon for making this moisturizer.  Then, feeling the summer spirit, I decided to whip up a stash of mojito body butter, which would pair well with my mojito body scrub.  I adapted my recipe from the book Organic Body Care Recipes--an amazing trove of great DIY self-care treats.  After a week back using my butter, my skin feels minty fresh and supple!

While making your own body butter might seem complicated or like it takes a lot of steps, it's really pretty easy.  The trick is to go slow; the hardest part (really not that hard), is waiting for the beeswax to melt.  I like to melt it separately from my other ingredients because it takes the longest to melt.  Once melted, you can slowly add other ingredients.  Don't be alarmed if the beeswax seems to harden with the introduction of oils--just add the oils a little at a time, and it will slowly melt down again.

Special Tools:

Clean tin can

Old saucepan

Ingredients from left to right: essential oils, coconut oil, olive oil, distilled water, and beeswax.

Ingredients from left to right: essential oils, coconut oil, olive oil, distilled water, and beeswax.

Blender

Spatula

Ingredients:

3/4 cup olive oil

1/3 cup coconut oil

4 tablespoons beeswax, roughly chopped into small pieces

1 cup distilled water

30 drops peppermint oil

30 drops lemon oil

Tin can in sauce pan with some beeswax in it.  I prefer to use an old saucepan that I don't cook with anymore--I use it strictly for beauty treats.

Tin can in sauce pan with some beeswax in it.  I prefer to use an old saucepan that I don't cook with anymore--I use it strictly for beauty treats.

1. Place the saucepan on low heat and fill halfway with water.  Then place the clean tin can in the center of the saucepan.  Put the beeswax in the tin can and let melt slowly. When beeswax is melted, remove from heat and allow to cool to room temperature (but not to solidify) about 5-10 minutes.

2.  While beeswax is cooling, mix together olive oil and coconut oil in a small bowl.  Heat for two minutes in microwave and let cool about 5 minutes. 

3.  Heat the distilled water (still in a microwave safe measuring cup) for two minutes in the microwave and let cool about five minutes.

Pouring the last of the melted beeswax into the blender while it mixes ingredients on medium speed.

Pouring the last of the melted beeswax into the blender while it mixes ingredients on medium speed.

4.  Blend your ingredients in a blender.  First add half of the oil mixture and begin to mix it on medium.  Once the oils begin to thicken, add half the water, then half the beeswax.  Blend for another 10-15 seconds or until first half of your ingredient are blended and being to thicken.  Using a spatula, scrape down the sides of the blender and then begin blending on medium again.  Add remaining ingredients (oils, water, beeswax) one at a time until fully incorporated together.  Scrape down the sides one last time and blend for another 10-15 seconds.  The mixture should be thick.

5.  Turn off blender and add essential oils, stirring them in manually with your spatula, then blend completely on medium for another 10 seconds.

Freshly jarred homemade body butter, cooling.

Freshly jarred homemade body butter, cooling.

6.  Pour body butter into containers (I use mason jars) and let cool for at least half an hour before capping.  If you find your water separating from your oils, don't worry, that's normal.  It just means that the water temp and the oil temp weren't the same when you blended them.  I've noticed the more I make this recipe (or variations of it!), the less that happens, so just keep practicing.  Store in a cool, dry place for up to one month or in the fridge for six months--that is the advice the book I adapted the recipe from gave.  Personally, I have stored this body butter in my bathroom sink for a couple months and it has been fine sans fridge.

7.  To use, apply after bathing or showering.  Use only a little at a time--a little goes a long way!

Enchantment Learning & Living is an inspirational blog celebrating life’s simple pleasures, everyday mysticism, and delectable recipes that are guaranteed to stir the kitchen witch in you. If you enjoyed what you just read and believe that true magic is in the everyday, subscribe to my newsletter below for regular doses of enchantment. Want even more inspiration? Follow me on Instagram, Facebook, Pinterest, and Twitter. Here’s to a magical life!

Comment
Share

A Study in Gin Tonics

Your first gin tonic was nothing special--just a perfect blend of ice, gin, tonic. It was in a little cafe in Barcelona's Gothic quarter probably visited by locals but unknown to the makers of guidebooks.  In fact, the only real defining feature of the cafe was the turquoise staircase winding up to the second floor of the building--the bright pop of color reminding you of your desert home.  Even the drink was homey in its simplicity as if you were in your own place and decided to whip up an evening cocktail. 

The second gin tonic was the stuff of dreams--tantalizing, ephemeral, yet pulling you into this world here and now, much like the Gaudi building you spent the day viewing. It came from a little hole in the wall famous for how well it handles this iconic drink.  It was made of Hendrick's gin infused with basil--your favorite herb--and graced with fat ice cubes and Swepps tonic water. You watched in fascination as the bartender filled your glass, a fat round goblet, to the top with your restorative elixir.  Your only distraction, the bottled of house infused spirits, like rows of apothecary jars along the bar.

You sat outside, watching cars whiz by, discreetly listening to your fellow gin drinkers.  The drink was cool and tart on your lips, laced with the perfumey botanicals that make an ideal gin.  The basil hits you last, like a memory or whisper of the herb at the back of your throat. Yes, this was the perfect palate teaser for tapas across the road.

Your last gin tonic was in another hole in the wall, this time in Sitges, a favorite tapas place for the locals. You don't remember much about that drink, only the sand and salty ocean that coated your skin, your hair, your lips. Even this was the taste of Spain.

Enchantment Learning & Living is an inspirational blog celebrating life’s simple pleasures, everyday mysticism, and delectable recipes that are guaranteed to stir the kitchen witch in you. If you enjoyed what you just read and believe that true magic is in the everyday, subscribe to my newsletter below for regular doses of enchantment. Want even more inspiration? Follow me on Instagram, Facebook, Pinterest, and Twitter. Here’s to a magical life!

Comment
Share

5 Tips for a Perfect Cup of Tea

It seems only reasonable that since I am in England, I figure out what makes a perfect cup of tea.  It is, after all, the stereotypical homeland of the perfect cup (let's not forget the Asian countries and beyond that also have pretty amazing tea histories).  The English cup of tea is the stuff of novels--how can anyone escape a scene featuring tea while reading an Austen or Dickens' story?  How can you survive an afternoon in London without searching for a marvelously fortifying cup of this magical elixir, for another matter?

While I go off in search of my perfect cup here, I offer you a few tips on making your perfect brew---advice straight from London tea connoisseurs!--at home.  Enjoy!

1.  Know your brew time.  Each type of tea is a little different, so it helps to know the steeping time for the tea you are using--too little brew time equals weak tea, too long leads to bitter brew.  Below is a list of the most common types of tea and their brew times.

Black = 3-5 minutes

Green = 2-3 minutes

Herbal = 5-7 minutes

Oolong = 3-5 minutes

White = 1-3 minutes

2.  Have patience.  Don't swish the hot water or stir the leaves as it brews--just let the leaves sit in hot water. Be civilized--don't rush!

3.  Don't use a strainer.  This is a tough one--especially if you are on the go--but strainers constrict the leaves, making it harder for them to unfurl, which then makes it more difficult for the leaves to bleed into the water.  Now I'm not saying you should never, ever use a tea strainer again in your life (I will still use them!), but if you have time, pour the tea directly into the pot and let them stew.

4.  Always use quality tea.  I know it's hard, but you will have to give up the tea bags!  Most tea bags use the dregs of the tea leaves and the tea bags themselves have harmful chemicals in them--yuck!  So stick to good loose leaf tea from a supplier you trust--you can thank me later. ;)  Then use 1-2 tablespoons of tea per 8 ounces of water to get a strong cup.

5.  Start with cold, filtered water.  If you don't filter the water, the tea can take on the taste of whatever minerals come through the tap.  Cold water ensures that your water boils nicely without tasting flat.

At its very best, tea is a break from the world, a hug in a cup, a consolation, a celebration, a soother, and a pick-me-up--all depending on what the drinker needs.  In any case, make sure that you treat your tea as a self-care ritual in the midst of your day.  Take the time to brew a good cup--it is so worth it!

Enchantment Learning & Living is an inspirational blog celebrating life’s simple pleasures, everyday mysticism, and delectable recipes that are guaranteed to stir the kitchen witch in you. If you enjoyed what you just read and believe that true magic is in the everyday, subscribe to my newsletter below for regular doses of enchantment. Want even more inspiration? Follow me on Instagram, Facebook, Pinterest, and Twitter. Here’s to a magical life!

Comment
Share

Spain's Gin Tonic: 5 Steps to Perfection

Perfect after a day at the beach it Sitges!

Perfect after a day at the beach it Sitges!

Spain is famous for its love of gin tonic--and no, I didn't forget the "and" in "gin & tonic."  The Spanish simply forget the "and" and go straight for the tonic. It seems only fitting that since I am both visiting Spain and love a good G&T that I should learn more about Spain's obsession with the drink--and how to make a perfect one!  So here's what I've learned so far:

1. They like their ice cubes big.  Bigger ice cubes mean the drink won't melt into tastelessness in the blink of an eye and the drink will stay cooler longer.

2. Choose good gin.  This should be a no-brainer.  The quality of a drink is dependent on its ingredients.  I use to order G&Ts at bars because they are hard to mess up--but now I realize you really can taste the difference between a cheap well gin and a solid one.  I recommend the inexpensive New Amsterdam gin for those of you who like a more citrus forward gin reminiscent of vodka.  If you are looking to splurge a little, Hendrick's gin offers a wonderful botanical element to your drink.

3. Use quality tonic water.  This means avoiding tonic water with fake sugar--another seemingly obvious rule, but one that is often overlooked.  Real sugar preserves the taste and frankly, is actually safer for you to drink than artificial sweeteners.  A good, but more expensive brand is Fever-tree, which doesn't have any artificial sweeteners or preservatives.  For a less expensive option, try Hansen's Natural Tonic, sweetened with natural sugar cane and containing no preservatives.

4. Don't over think the garnishes, according to the Spanish.   Lime is always the best option. While they like to add a little flair to the gin tonics with interesting flavors like lavender, they suggest that you shouldn't overload your drink with too many garnishes.  It's a drink, not a salad!

5. Keep it simple.  Sure there are lots of fun twists on this classic drink, including my Grape-Lime G&T. Just don't get so caught up on the flavor riffs that you lose sight of the basic flavor profile of a good drink: the bright flavor of the lime, the floral kick of the gin, and the bitter tang of the tonic's quinine. 

Most of all, take some time to sit in the sun and enjoy your drink!

Enchantment Learning & Living is an inspirational blog celebrating life’s simple pleasures, everyday mysticism, and delectable recipes that are guaranteed to stir the kitchen witch in you. If you enjoyed what you just read and believe that true magic is in the everyday, subscribe to my newsletter below for regular doses of enchantment. Want even more inspiration? Follow me on Instagram, Facebook, Pinterest, and Twitter. Here’s to a magical life!

Comment
Share

3 Citrus-Ginger Gin Fizz

In honor of my wonderful patio garden, I had my family over for dinner last night.  It was a perfect garden party (albeit a patio garden party) filled with the bounty of spring.  We had radishes and young beets in our salad, asparagus and roasted lamb seasoned with herbs from my garden on our plates.  There was also fresh pesto crostini for appetizers and, of course, a beautiful view of my potted plants.  Naturally, when you have a garden party, you need a cocktail that tastes like spring in a glass, which is why I developed my 3 citrus-ginger gin fizz. 

A traditional fizz is simply gin, lemon, a little sugar, and sparkling water--an absolutely refreshing way to wind down a warm spring day.  I've added a twist to this recipe by using three types of citrus--grapefruit, lemon, and lime--and the addition of ginger simple syrup in place of the sugar.  There are few combinations as heavily as citrus and ginger in my book--they play on each other's brightness.  Make sure to use freshly squeezed citrus juice--the bottled kind doesn't have as bright a flavor and contains lots of hidden sugars. You can also skip the gin and have a refreshing mocktail, as my pregnant sister did.

Even if you aren't hosting a garden party anytime soon, I'd recommend enjoying this cocktail to kick off your Saturday night!

IMG_3061.JPG

Ingredients:

Juice of 1 grapefruit

Juice of 1 lemon

Juice of 1 lime

6 ounces (3 shots) ginger simple syrup

Sparkling water

Combine three juices together in a mason jar or other container.  In four glasses, add one shot of the juice mix to each glass and 1/2 shot (.75 ounces) of ginger simple syrup.  Top with ice.  Fill the glass to the top with sparkling water and stir.  Enjoy in a shady grove, patio garden, or other lovely outdoor space.  Serves 4.


Enchantment Learning & Living is an inspirational blog celebrating life’s simple pleasures, everyday mysticism, and delectable recipes that are guaranteed to stir the kitchen witch in you. If you enjoyed what you just read and believe that true magic is in the everyday, subscribe to my newsletter below for regular doses of enchantment. Want even more inspiration? Follow me on Instagram, Facebook, Pinterest, and Twitter. Here’s to a magical life!

Comment
Share

Ginger Simple Syrup

Ginger is one of those epic all-around healing foods that I can't get enough of.  It adds brightness and spice to everything from a good Asian stir-fry to my morning quinoa.  This time of year I absolutely love it as an ingredient in the sunny warm-weather cocktails & mocktails that become so appealing after a day spent outdoors.  You can also mix it with sparkling water to make a light, refreshing soda.  In either case, my ginger simple syrup is an ingredient I like to keep on hand for those impromptu fancy drinks that feel like summer in a glass.

Ingredients:

1 cup sugar

1 cup water

1/4-inch by 1-inch chunk of fresh ginger, peeled and sliced thinly

To make the simple syrup, bring water and ginger to a boil. Stir in sugar until fully dissolved.  Reduce heat.  Simmer for 5 minutes.  Remove from heat and let cool completely.  Strain out ginger and pour syrup into a mason jar.  Store in fridge for about one week.  Make approximately 1 cup of syrup. 

Enchantment Learning & Living is an inspirational blog celebrating life’s simple pleasures, everyday mysticism, and delectable recipes that are guaranteed to stir the kitchen witch in you. If you enjoyed what you just read and believe that true magic is in the everyday, subscribe to my newsletter below for regular doses of enchantment. Want even more inspiration? Follow me on Instagram, Facebook, Pinterest, and Twitter. Here’s to a magical life!

Comment
Share