Enchantment Learning & Living Blog

Welcome to Enchantment Learning & Living, the inspirational space where I write about the simple pleasures, radical self-care, and everyday magic that make life delicious.

Cooking with Mercy Farm Turnips

Turnips feature prominently in Weep, Woman, Weep. Why? because I LOVE root veggies, including turnips. In fact, when writing this novella, I became more than a little obsessed with them, salad turnips, tasting like buttery radishes and purple top and scarlet turnips…there are a surprising number of different types of these humble root veggies.

Mercy, the central character in Weep, Woman, Weep, ends up starting Mercy Farm, and among the many vegetables and herbs she grows are turnips. In fact, turnips are the thing that gets her going on the whole idea of turning the land she inherited into a working farm. She later becomes rather famous for having some of the best produce—turnips especially—in and around Sueno, New Mexico.

The turnips become a symbol for the new life Mercy’s trying to build for herself from nothing but hard work and heartache—and a dream that she can be more than La Llorona’s curse running in her blood.  I later learned that turnips are, in fact, symbols of success and better fortune. I love it when synchronicity is at play to show me that I picked turnips as a symbol of Mercy’s new path for a reason!

Of course, it took me a little bit to realize my obsession with this humble root vegetable wasn’t entirely normal.  I had the pleasure of being invited to the Romancing the Gothic book club this past spring so the members could ask me questions about my gothic fairytale. It was then I realized that my interest in turnips might be a little, well, you know, strange.  

The book club readers asked one simple and very important question: What’s up with all the turnips?!?! Aren’t they, like, gross??? There was many a horror story of boiled and mealy veggies that were enough to make even a turnip lover queasy.

As I draft the sequel to this book, Mercy Road, all this turnip talk becomes a bit of a running joke. Santos, the protagonist of that tale, had never really eaten turnips until becoming Mercy’s neighbor. But, as much as he loves Mercy and her produce, even he thinks she talks about turnips too much. To be fair, she’s been on her own for a long time, but still, there are other things to talk about!  Perhaps over a delicious meal of…turnips.

Yes, Mercy’s got me “talking turnips,” too, as Santos would say. And the book club chat made me realize that not everyone loves root vegetables as much as I do. And though I have yet to grow my own successfully, I eat them constantly. If you’re even a little bit curious about how to enjoy turnips, here are a few suggestions below (and, honestly, how I usually eat them).  

Salad turnips look like white radishes and are great in…salads. Just slice them up and add them to some greens. They are also great on crudite platters and dipped in aioli

For larger turnips, like purple top and scarlet turnips, consider roasting them like you would potatoes.  Olive oil and salt are all you really need, although adding cumin, green chile powder, or other spices add a nice kick.  

I like to make turnip gratin when it gets colder out. It is delightful and so comforting without feeling as heavy as a traditional potato gratin.  I’ve also been known to use pureed cannellini beans in place of cream when I want something even lighter. It’s still creamy, just not as heavy.

These larger turnips are also great in stir-fries because they really soak up whatever sauce you’re using and take on whatever flavor profile you want.  They are also hearty enough to maintain a firm texture with no mushiness (that only happens when you boil them to death!).  

And speaking of mush…you can mash them like potatoes, too, although with olive oil, chicken stock, and seasoning, they are a culinary delight.  Add a sprinkling of gruyere, and it’s heaven!

Any kind of turnip can be pickled, too, and I often use them in my quick pickled veggies recipe.

So, as you can see, there are a lot of ways to use turnips. Do you eat turnips? How do you cook them?  And, if you haven’t yet considered eating them, give some of these suggestions a try and let me know what you think!

Enchantment Learning & Living is an inspirational blog celebrating life’s simple pleasures, everyday mysticism, and delectable recipes that are guaranteed to stir the kitchen witch in you. If you enjoyed what you just read and believe that true magic is in the everyday, subscribe to my newsletter below for regular doses of enchantment. Want even more inspiration? Follow me on Instagram, Facebook, Pinterest, and Twitter. Here’s to a magical life!

Healing Face Serum with Calendula & Vitamin E

If there’s one thing I hate, it’s overpriced organic beauty products that trick people into thinking that more money equals more healing properties. Not so! Over the years, as longtime readers of my blog know, I’ve made my own body butter, scrubs, and makeup that are just as luscious and eco-friendly as what you can get at a nice natural market—without the sticker shock.

One of my favorite beauty products to make of late has been this healing face serum, that hydrates and softens my face and neck. It will give you that eternally youthful glow! It also makes a great stocking stuffer and little extra gift for anyone wanting to pamper themselves.

I most often use my homemade calendula-infused oil in this healing face serum, although you can use plain almond oil if you prefer—you just won’t get quite the same healing properties. Calendula oil is perfect for nourishing and revitalizing your skin, especially in the colder months when our skin can start to look dull and rough.  The vitamin E, raspberry seed, and rosehip oils all have wonderful vitamins that brighten and tone the skin and act as antibacterial agents to prevent breakouts.  For a nice scent and extra anti-bacterial properties, I like to add a few drops of clove oil.

Healing Face Serum:

Container:

Small bottle with dropper

Ingredients:

1/4 cup calendula oil

1/8 tsp organic vitamin e oil

1/8 tsp raspberry seed oil

1/8 tsp rosehip oil

1-3 drops clove essential oil (optional)

Mix all ingredients in a small bottle and shake well.  Store in a cool, dry place for up to six months.  To use, wash face thoroughly and pat dry.  Then add a few drops of this serum onto your palms and gently massage on your face before you go to bed at night or at the start of the day before you apply any makeup or sunscreen.  You can even lightly dab a little extra around your eyes at night to minimize wrinkles.  As you apply, think of the luminous sun-kissed skin of summer and the fiery delights of a summer love affair.  Know that you can reignite this flame, even in the depths of winter.  

Enchantment Learning & Living is an inspirational blog celebrating life’s simple pleasures, everyday mysticism, and delectable recipes that are guaranteed to stir the kitchen witch in you. If you enjoyed what you just read and believe that true magic is in the everyday, subscribe to my newsletter below for regular doses of enchantment. Want even more inspiration? Follow me on Instagram, Facebook, Pinterest, and Twitter. Here’s to a magical life!

Harvesting Sunshine for Rainy Days: A Recipe for Calendula Oil

I love Autumn. The season is like amber, distilling the joys of summer in its honeyed essence for future pleasure.  It’s an important thing to do: cultivate and stock up on happiness, sunshine for rainy days.  That’s why so much of my brujeria practice is focused on pleasure magic or the intentional conjuring of the luscious hedonistic energy in our day-in, day-out.  

Let’s face it: we can get stingy with our joy.  I blame this on the puritanical roots in Western culture that have made us forget our deeper and more profound pagan legacies that cultivate a natural sensuality in all things. Pleasure—that bone-deep, life-affirming stuff—happens when we live in harmony with the earth and the natural cycles of life.  It’s when we listen to our inner voices that tell us what will truly fulfill us, not the loud mindless business of mainstream society.  And it’s when we allow ourselves to dream, hope, and conjure things that make us feel good…just because.  We can learn a lot about ourselves by understanding what gives us this unfiltered sense of happiness.

Autumn has always been the perfect time to reflect on these things, as we enjoy the fruits of the year’s labor while setting aside some of that abundance for the days when we can’t make our own sunshine.  What do we prioritize when it comes to harvesting and preserving?  What can’t we live without when the days get short and the nights long and cold?  As I marinate on these questions, I’m drawn to the brightest of flowers: the humble marigold and her medicinal cousin, calendula.  

While many people conflate the two flowers, these sunflower family members are actually two distinct plants with similar magical properties.  First, there is the marigold from the Tagetes genus which is the flower we most often see in Dia de Los Muertos celebrations.  Traditionally, this flower symbolizes the transience of life as it blossoms and fades fairly quickly, but I tend to think of it as more symbolic of eternal life.  Even when the bloom fades, the petals are easily harvested and put to further use.  You can also collect the thin black seeds and begin again.  See?  Life doesn’t end. It merely transforms itself, so long as you live in harmony with the ebb and flow of our natural rhythms.  The marigold is also a very joyful flower.  It’s hard not to smile when you’re holding a bouquet of orange, yellow, and red edible pompoms!  

These flowers are also natural pest deterrents and extremely hardy, able to grow almost anywhere with little fuss or care.  I love the metaphor of this: their sunshine magic banishes proverbial energetic bugs and promises us that our happiness is not as fragile as we might think.  I like to harvest marigolds from my own garden or purchase from a reliable organic local producer to sprinkle in salads or to add a pop of color to my herbal teas. Every time I put a marigold in my mouth, I am reminded of the fire in my belly and a passion that cannot be tamed.  

The marigold’s cousin, calendula, or Calendula officinalis, often more colloquially known as pot marigold or common marigold, looks like a yellow daisy.  This is the flower herbalists and kitchen witches use to concoct healing potions for the skin.  Every year, I love to get some locally harvested and dried organic calendula or pull it from my own garden to make calendula-infused beauty oil.  I use it in everything from soothing face serums and body butters to hair oils and cuticle creams.  Calendula is one of nature’s enteral soothers, softening the edges of our thoughts and acting as a healing balm to the soul.  

These are the magical plants I come back to each Autumn in an effort to bottle and jar as much sunshine as I can for the coming months.  I’m liberal with them all year round, wantonly planting them wherever I can and relishing their beauty from seedling to dried flower petals.  These are flowers that remind me of the eternal summer of my soul even as I make my way through the various seasons of my life.  I feel like I’m literally harvesting liquid sunshine! 

These flowers are pure sun magic, a reminder that life doesn’t always have to be so hard, that we have the power to chase away darkness, the power to welcome prosperity and healing.  Marigolds and calendula feel especially life-affirming to me in a post-pandemic world, as we relearn how to navigate the world safely and with joy, while not forgetting the sorrows of the past year—that’s Dia de Los Muertos marigold magic again, reminding us that we can mourn what has passed and still know the joy of transformation.  Calendula is then there to protect us from the fear and anxiety that might taint our thoughts and illuminate the way forward with passion, warmth, and a generosity of spirit. 

Neither of these fiery flowers will allow us to wallow or stagnate in the energy of the past.  Instead, they invite us to move forward with grace, love, and more than a little creativity.  Nothing is what it once was, but the marigold reminds us of our profound capacity for blissful metamorphosis.  It might feel like death, but it is only a rebirth.  Like Persephone returning to the underworld in Autumn, these plants remind us that there is much joy in turning inward, going slow, and basking in the honeyed abundance of the season.

As I prepared each year for Samhain and Dia de Los Muertos, for me a time to honor the Dark Goddess and release the dead parts of myself, I always make sure to make a batch of calendula oil and my healing face serum, one of my favorite ways to use this oil infusion.  I use only organic ingredients since it is going on my body.  As I make it, I think of all the glorious parts of summer, the parts of myself I want to give more light to, and the passions I want to nourish.  I tend the jar through November, infusing it with gratitude and a deep appreciation for the love in my life and the abundance I’ve conjured this past year.

One of the great things about this recipe is that it is so versatile. You’ll notice I didn’t give exact quantities in my ingredients list. That’s because you should feel free to make as much or as little of this oil as you want. You can make it any time of year, but my personal ritual is to make it during the late Autumn. I prefer to use dried calendula as it is easier to work with (fresh leaves are more likely to go rancid).  Similarly, I like to opt for the cold steep method, rather than the faster heated method.  

I love the meditative process of allowing the oil to infuse for six weeks as I feel it gives it more time to absorb the good energy I’m imbuing into the concoction. Every time I use these oils, I’m reminded of the abundance mindset I cultivate day-in, day out, and the infinite pleasure I get from invoking the sun magic of the marigold and the calendula.  

Recipe for Calendula Oil

Tools:

1 sterilized glass jar 

1 bottle the same size as the jar

cheesecloth

funnel

Ingredients:

1 part organic dried calendula leaves 

2 parts organic almond oil 

2-3 drops organic vitamin E oil

Instructions:

Fill a clean jar halfway with organic calendula leaves.  Cover completely with almond oil, making sure to leave about two inches of space at the top of the jar as the flowers will expand as they absorb the oil.  Add a few drops of vitamin E oil to act as a preservative.  Use a plastic lid if you can.  If you have to use a metal lid, place a piece of parchment paper between the jar and the lid, as the metal can sometimes rust. 

Let sit in a cool, dry place for 4-6 weeks, shaking periodically.  Make sure to mark the start date on the jar to keep track of your infusion time.  When I shake the jar, I make sure to consciously think of the medicinal and magical properties of this flower so I can infuse my good intentions into the blend. 

When it’s ready, strain oil through a cheesecloth draped over a funnel into a dark bottle and store in a cool, dry place for up to six months. Use on its own or in body butters and oils.  It’s great for eczema or sensitive skin.  

Enchantment Learning & Living is an inspirational blog celebrating life’s simple pleasures, everyday mysticism, and delectable recipes that are guaranteed to stir the kitchen witch in you. If you enjoyed what you just read and believe that true magic is in the everyday, subscribe to my newsletter below for regular doses of enchantment. Want even more inspiration? Follow me on Instagram, Facebook, Pinterest, and Twitter. Here’s to a magical life!

Easy Preserved Lemons Recipe

IMG_2136.jpg

Four months into my stay at home life and I’m finding that one of my greatest comforts is time set aside each week for a little kitchen witchery. There’s something about creating a lovely meal or tinkering with my herbal apothecary that keeps me grounded and nourished. It reminds me that while there is much I can’t control right now, I do have tremendous power in the energy I put into the world, the loving communities I protect and nourish, and the kind of magic I can whip up within the safety of my sanctuary.

Lately, I’ve been drawn to working with the kind of things we think of as kitchen discards: coffee grinds, carrot tops, and lemon rinds. My younger sister, an artist in Italy who specializes in making wonderful creations from life’s discards, first taught me the beauty of the used up citrus peel. There is magic in taking something that seemingly has no value and making it useful once more.

Of course, I’m no stranger to the similar magic of taking a bitter pill and turning it into sweet medicine, like the year I learned how to make limoncello, the Italian liquor made from lemon peels. I had been going through a difficult time—detoxing from graduate school, moving home, and trying to find full-time work. And, you know, all-around trying to figure myself out. This limoncello was my potion, my spell for turning even the bitterest of fruits into something sweet. I’d first tasted it when I visited my sister in Italy for the first time. It was midnight in Florence on the Palazzo Vecchio. I sipped a cold glass of sunshine and, for the first time, felt my heart begin to mend. Years later, I look back on that time—first drinking, then learning how to make limoncello—and marvel at the profound conjuring and belief it took to remake some of my most heartbreaking experiences and use them for the foundation of a more magical life. That’s the power of limoncello.

Now, I return to the wisdom of the lemon, and the wisdom of Italian living, with this preserved lemons recipe. This is something common along the coast, in towns like Capri where lemons plentiful. They are the perfect way to make the bright taste of summer linger all through winter and make a great addition to any meal, sauce, or cheese platter. Their salty, tart flavor adds unexpected depth to dishes and puts those often-discarded lemon rinds to good use. It’s also the perfect kind of quarantine cooking…you slice and dice a few things, then you let it sit, just like my easy marinated olives.

Not going to lie—when I get tired of the world and the voices who refuse to believe the two pandemics (COVID-19 and racism) we’re living through are real, I retreat into my kitchen to bottle sunshine. This is not in an effort to forget about what’s going on outside my door, but to get grounded and nourish myself so that I am a force for good in the world. We’ve been given plenty of lemons this year. Doesn’t mean we can’t turn them into something beautiful.

I also love the idea of taking something like a whole lemon—peel, pith, and all—and turning it into something delicious and edible. Although not traditional, I’ve taken to throwing in sliced lemon rinds from juiced lemons into this recipe so that nothing gets wasted. I only use organic ingredients, as usual, but this is especially important for this type of recipe which uses the whole lemon, including the outer rind where pesticides and other gross chemicals can hide if you’re using conventional lemons. Even if you don’t usually use organic produce, definitely use organic for this recipe otherwise you’ll end up with pesticide-flavored marinade, yuck!

This is one of those versatile recipes where you use what you have and make as much as you want, so you’ll notice I don’t give specific measurements. The quantity of each ingredient depends on how much you want to make. For a small jar, like the one pictured, I used one lemon, one rind of another used lemon, the juice of about two lemons, and a few tablespoons of salt.

This is the perfect recipe for when you’re feeling a little salty, a little sunny, and want to conjure joy from the bitterest fruits.

Ingredients:

Lemons

Sea salt

Lemon juice

Lemon rinds (optional)

Instructions:

  1. Wash lemons thoroughly and slice into spears or smaller wedges, whichever you prefer. Slice lemons rinds the same way if you are using them.

  2. Sprinkle sea salt in the bottom of your chosen jar until it is covered. Add one layer of lemons and rub them with salt. Mash with spoon, then add another layer. Repeat until all your lemons are in your jar. Top with more salt and mash once more.

  3. Pour fresh lemon juice over salted lemons until contents of jar are fully covered with juice.

  4. Close jar and label it with the date. Store in fridge for 3-5 weeks, shaking once in a while.

  5. After 3-5 weeks, your lemons are ready! Use the sparingly as a little goes a long way. Lasts indefinitely.

Serving suggestions: Top thin slices on kale pizza, mince to put until salad dressings, pair with aged gouda, or include in meat marinades. Enjoy!

IMG_0810.jpg

Enchantment Learning & Living is an inspirational blog celebrating life’s simple pleasures, everyday mysticism, and delectable recipes that are guaranteed to stir the kitchen witch in you. If you enjoyed what you just read and believe that true magic is in the everyday, subscribe to my newsletter below for regular doses of enchantment. Want even more inspiration? Follow me on Instagram, Facebook, Pinterest, and Twitter. Here’s to a magical life!

Easy Marinated Olives

One of the lighter sides of stay-at-home life is social media newsfeeds overflowing with home cooking experiments ranging from bread making experiments to creative kitchen-sink meals that help minimize trips to the store. People cook to feed their families, self-soothe, and otherwise relax and practice self-care. I love it! It’s like a collective conjuring of health and homey good vibes.

That said, as much as I like to cook, I’m not one of the home cooks that has a whole lot of energy for fancy recipes, much as I love to get my inner kitchen witch on. Teaching took a lot out of me which meant my own cooking experiments had to be easy, fun, and all-around low maintenance. All by way of saying, I seriously got into marinating olives.

Little dishes like tapas or Italian apertivo have to be some of my favorite dishes and I’ve been known to make a meal of good cheese, fresh crudités, and olives come summer Saturday nights. Add a delicious cocktail or glass of rose, and I’m in heaven!

Marinating olives has brought my happy hour fun to a whole new level. The trick is to start with a jar of good quality olives. I like Jeff’s Naturals, especially the castelvetrano and kalamata olives, but feel free to experiment with what the brands and olive types that you have on hand. You can also adapt the marinate to whatever portions you desire. Don’t have red wine vinegar? Use white or apple cider vinegar. This isn’t a standard recipe, per see, more like a set of guidelines. Think of this as a kitchen-sink recipe, where you use what you have on hand. I’ve never made the same type of marinade twice and I’ve had lots of fun experimenting with different herbs and spices. A strong citrus flavor tends to be my favorite, but play around and see what works for you.

This is a fun recipe when you want to try something new but don’t want to go full-on homesteader, baking your own sourdough bread or the like. It’s pretty foolproof compared to breadmaking and so utterly delicious. But I warn you, making these include certain side effects. You might find yourself putting on an old jazz record, arranging stray wedges of cheese on a plate, and pouring yourself a glass of wine. You might find, in short, that you want to put the world on hold for a bit and enjoy a lovely happy hour.

Ingredients:

1 jar of olives

1/4 cup vinegar

1/4 cup olive oil

2 cloves garlic, sliced

2 organic citrus peels or slices (lemon or orange work really well)

4-6 sprigs of herbs (my favorites include thyme, rosemary, and oregano)

1/2 tsp red chile flakes

1 tsp mustard seeds

1 tsp peppercorns

Add all ingredients except olive into a saucepan and simmer on the stove for ten minutes. Drain olives and place them in bowl. Pour ingredients in saucepan over olives, stir, and let sit on the counter until cool, about half an hour. Serve immediately, or store in a mason jar in the fridge for a few weeks. Enjoy!

IMG_1411.jpg

Enchantment Learning & Living is an inspirational blog celebrating life’s simple pleasures, everyday mysticism, and delectable recipes that are guaranteed to stir the kitchen witch in you. If you enjoyed what you just read and believe that true magic is in the everyday, subscribe to my newsletter below for regular doses of enchantment. Want even more inspiration? Follow me on Instagram, Facebook, Pinterest, and Twitter. Here’s to a magical life!

The Bodice Ripper Cocktail: Or, a Toast to Romance Novels

Confession: I love trashy novels covers. Old pulp covers and fuschia-tinted romances. I mean the over-the-top ones with Fabio-heroes with half-open shirts and long hair more luscious than my own. The ones with heroines in the throws of passion so intense their very clothes seem to melt off them. If there’s a pirate ship in the back, a carriage (which has no doubt seen a lot of action), or some obscenely large manor in the background, then I’m done for. Dragons flying in the distance? Be still my heart!

Here’s the thing, though. It wasn’t until fairly recently that I started to voraciously read these books. Sure, I’d picked up a few slim Harlequins and thumbed through the scandal-ridden pages of mid-century pulp. I’d even read a few Nora Roberts books. But most of my romance novel reading happened within the confines of my dissertation work on The Courtship Novel.

You know the one: The Jane Austen-Personal-is-Political-Subversive-Feminist-Slice-of-Life stuff. I found my home in reading these stories by, for, and about women negotiating a patriarchal world without the financial resources to give everything the finger. I was a lowly grad student, dependent on my professors’ approval for my future success, all of which hung on earning my doctorate. I wasn’t grand enough to be a George Sand and flaunt social rule, simply because I wasn’t a rich noblewoman.

No, I was confined to the social constraints of mere working mortals. I also lacked the desire to throw caution to the wind and run away to live the life of a vagabond writer like Mary Shelley. I like my family, probably because they are a deal less gothic than Shelley’s. And I’m pretty domestic, resembling a hobbit more than a reckless heroine, one who goes on adventures here and there with the sure and comforting knowledge that there is always Bag End to return to with all its books, and flowers, and good food.

So there I was, a mestiza from the desert southwest, roughly fifteen years ago now, reading 18th- and 19th-century British courtship novels. In them, I found young women like me, both pushing against social norms and wanting to find their home in them, eager to live a life that was luscious and full in a world that seemed determined to fence me in. My complicated relationship to my own mixed-raced cultural heritage—a product of colonization and a history of violence—left me in search of stories with happy endings for women like me. I found my answers, at least in part, in these domestic tales by, for, and about women.

I wrote about Mary Wollstonecraft and the transgressive nature of the Female Intellectual, along with the interpenetrative nature of sexual and intellectual stimulation. I explored my own complicated relationship to my sexual and intellectual identity as a brown woman in the white city of Seattle, grappling with the realities that my body would always be politicized, sexualized, and scrutinized no matter what I did. That I would often be highly visible when I most wanted to be invisible. And I discovered that I could use the liminal space I occupied as an empowering sphere in which I could redefine what it means to be a successful woman of color. I wrote very smart things about all this too. And used big words and serious expressions so that others knew that what I said was smart and that I was to be taken Very Seriously.

All the while, in secret, I collected books with saucy covers and devoured trashy novels of all genres every chance I could get. I gobbled up urban fantasy, sword and sorcery, paranormal, steampunk, cozy mysteries… literally anything and everything that would let me escape the hell that is graduate school, at least temporarily.

Then something strange happened. I found I had very little interest in stories that didn’t have some sort of love plot, however tangential. I mean, as someone studying the history of western sex and gender ideologies and their choke-hold on modern life (regardless of your cultural orientation), I understood the importance of having female-centered stories that weren’t about love and that didn’t end in marriage…but I just didn’t care.

I wanted romance. The kind that made you fall in love with life and fell like you were the heroine of your own story. Stories that reminded me that I was blood and bone and feelings. Not just a brain. I was desperate to remember what it felt like to be in love with life and reveled in having a space where emotions and instincts were valued.

I could let down my guard in these stories. I didn’t have to worry about being a hysterical brown woman every time I had An Emotion. These stories taught me that my feelings (so often suppressed or contained) were telling me something important and that I needed to listen to them. They told me that my desire to love and enjoy my body was separate from the white gaze that hyper-sexualized me. They allowed me to separate my desire for romance from the social pressures to Hurry Up and Find a Mate Already. And they reminded me that I didn’t just have to sacrifice my personal life in order to be successful in my professional one, or vice versa. That was a lie mainstream culture told to keep minority bodies down. These books, in short, became my proverbial conduct manuals for the kind of life I wanted to craft for myself once I earned my doctorate.

Plus they were fun! At a time when I felt like I had to keep a firm grip on every thought, emotion, or action in order to be taken seriously, these books were an escape. I could go from being a struggling Dom at the University of Washington to a willing Sub within the covers of these books and enjoy every minute of it. (I would later learn that this was a big part of the appeal fo these books for working women in the 80s and beyond.) In short, these books with strong romantic threads and the over-the-top covers helped me tap into my inner hedonist and the playful Eros energy that so easily got clogged in the uptight world of academia.

The Art of the HEA

So I finished graduate school. I got a full-time job—actually my DREAM job at my local community college. Then I started blogging, mostly in an attempt to figure out what happiness looked like for me now that I actually had the time and space to devote to crafting a more balanced life. I had a steady income in the city I wanted to put roots down in (Albuquerque—my hometown). I had time to write just for me. I could take better care of myself, emotionally, mentally, and physically.

I was so grateful to be back in a land where it was normal to be a brown person and cultural diversity was the norm. Plus weekends with actual free time became a thing for me, as were evenings that started around 5 instead of 9 or 10. So I blogged, exploring what happiness looked like for me. The blog became an award-winning book, a lifestyle and an ongoing self-care practice that helped me tap into the magic of everyday life. To be clear: these were all things I’d fantasized about for years and now they were coming true. Without being entirely conscious of it, I was already in the midst of building my own Happily Ever After (HEA).

It wasn’t until my Year of Radical Self-Care, in which I consciously and deeply explored how to best listen to my needs day-in and day-out, that I discovered the joys of the modern romance novel. I’d been designing a course for my local university’s Honors College on romance in popular culture and felt I couldn’t possibly address that topic thoroughly without looking at the romance novel. I’d read a lot about it. I had a whole history of courtship novels to inform me. I picked up books here and there and continued to read romance-adjacent stories. But each time I tried to dive into the genre, I got completely overwhelmed by options. I was sure there was a lot of good stuff out there, along with the bad and just so-so, but I just didn’t know where to look. So designing that course became a way for me to finally and properly explore the world of the modern romance novel.

That’s when I found Smart Bitches, Trashy Books and I haven’t looked back since. It told me everything I needed to know, offering up a whole cornucopia of books in a variety of sub-genres with graded reviews. Remember all those romance-adjacent books I’d been reading? Turns out many of them were all pretty much plain old romances! Steampunk romances, paranormal romances, fantasy romances, romantic suspense, Gothic romances…I could go on but you get the idea.

Looking back, it’s no surprise that I finally drove into the world of romance novels during my year of radical self-care. They were soothing. They made me feel good. They lifted my spirits and helped me release stress. But most of all, they made me feel empowered. Reading books by women of color, especially, made me appreciate myself and my accomplishments more, as well as give me the confidence to continue developing an identity outside of my professional life.

I felt sexy, beautiful, bold and powerful—things I didn’t always feel at work when it seemed I had to curb my feminity to be taken seriously or be constantly angry to assert healthy boundaries (it should be no secret that minority women work twice as hard to prove themselves, compared to their white male counterparts). But romance novels taught me that I didn’t just have to be about the struggle. That I was allowed to have joy.

Now this blog is getting way longer than I intended and it has taken me much longer to write because, once I started, I found that I had a lot to say (a whole book’s worth it sometimes feels!). So I’ll start wrapping things up by saying this: I realized that my journey in reading and writing about courtship novels, blogging about everyday magic, and immerse myself in the romance genre, have all been because I was struggling to find narratives in which people of color and othered bodies are allowed to find happiness, joy, and pleasure. That those things were nothing to be guilty or ashamed about (trust me—when you reach a certain level of success, it is easy to start feeling like you have to apologize for it). In these books I began to discover that happiness wasn’t in limited supply and pleasure wasn’t something that could only be enjoyed in small, furtive sips.

Speaking of sips, I think it’s high time I get around to the whole reason I started writing this blog: The Bodice Ripper Cocktail. This of this as my tribute to all that is sacred and delicious in the pleasure of a good trashy novel. And, yes, not all romances are created equal. There are plenty of narratives that reinforce white ableist patriarchy or outdated sex and gender norms. But on the whole, I think the genre from the 18th century to now, is inherently social-justice based. That doesn’t mean that there isn’t trial and error as we explore healthier narratives, moments in which it feeds back into the patriarchy it is trying to subvert, or the fact that we have to grapple with the historical moments in which a book is produced.

Take the old school bodice ripper, after which this cocktail is named. There’s plenty of non-consensual stuff happening between the pages of those books. But, in a world in which women didn’t yet have sexual identities independent from the male gaze in the eyes of mainstream society and the fear of the autonomous female body was centuries old, it makes a certain sense that these issues would be explored within the “safe framework” of male control. Like the courtship novel of the 18th century that had to end in marriage, the bodice ripper fo the mid-20th century had to include aggressive male-driven sexual action in order to exist safely within the framework it was trying to subvert. It doesn’t mean that those narratives are okay, just that they represent the early stages of a genre trying (and not always succeeding at) changing the way we think about gender, sex, agency, and HEAs. Heady stuff, huh?

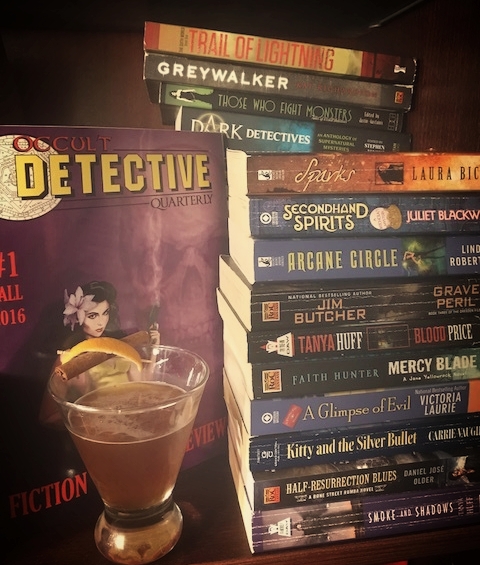
Still, the Bodice Ripper and all that came before and after it is worthy of celebration. If you want to begin your own journey into the realm of the romance novel, check out some of the books in photo below and indulge in some of these fantastic podcasts, in addition to Smart Bitche Trashy Books, that wonderfully frame the genre, its issues, its joys, and the wonderful range of books you can explore within it: Heaving Bosoms Podcast, Shelflove Podcast, RomBkPod, and Book Riot’s When in Romance. You can also check out my HEAs All Day book club if you want to learn even more about romance novels as social justice narratives.

The Cocktail Recipe

Okay, so I know it is a tall order to make one drink to encompass all that is romance since the genre is so wide and eclectic. We’ve got the sweet and cozy romances, reminiscent of a cup of hot cocoa, the sleek and modern martini variety, and the NSFW kind, akin to all those sugary drinks with dirty names, and anything and everything in between.

For the purposes of this cocktail, however, I decided to honor the spirit of the bodice ripper and all those trashy book covers I’ve coveted for all these years. I wanted my drink to be one part liquid courage, one part wanton abandon, with a dash of heat (or more if you are so inclined!). I needed to be bracing and a little sweet. And yeah, there should be cherries involved, if we’re sticking to the Old School variety of these novels, wink wink.

My drink is a riff on the sidecar. I swapped the brandy for Effen cherry liquor, which lends a lush vanilla cherry base. To keep the drink from being cloying, I used a citrus-peel forward orange liquor (see link below) and lemons juice. The plot twist is a few dashes of chili pepper bitters because you can’t have a bodice ripper without some heat! If you don’t have cherry vodka or just want to be like the modern romance novel and abandon the cherry-focal point, regular vodka will do.

This drink embodies the spirit of a genre that has inspired me to be fearless in my acceptance of pleasure and to open myself to the deliciousness of life. You’ll also notice that the books in the image positively OVERWHELM the drink. That’s because I was trying to make things, well, overwhelmingly bodice-ripper-y or perhaps heaving-bosom-y. In other words, for you romance novices, I wanted to show how the books overwhelmed the drink, much in the same way the emotions and sexuality overpower the people in these stories enough to rip a bodice or two…or, better put, cause a heroine to burst out of hers. If this sort of logic doesn’t make sense, drink this cocktail and read it again. All will become clear.

Oh, and if you saw Pride & Prejudice in my photo and don’t understand why I would consider it a bodice ripper than you’re reading it wrong. Again, drink this cocktail and revisit this classic courtship novel. All will become clear.

Ingredients:

2 oz Effen cherry vodka

3/4 oz freshly squeezed lemon juice

3/4 oz orange liquor, preferably one with an orange peel-forward flavor

2-10 drops smoked chili bitters depending on how HOT you want it!

ice

optional lemon peel or cherry for garnish

Combine ingredients in a shaker and shake vigorously for a minute. Pour into martini glass. Serves one, so double the recipe and invite your personal Fabio over. Pairs well with steamy reads, long walks on the beach, and insta-love.

Bodice+Ripper+Cocktail.jpg

Enchantment Learning & Living is an inspirational blog celebrating life’s simple pleasures, everyday mysticism, and delectable recipes that are guaranteed to stir the kitchen witch in you. If you enjoyed what you just read and believe that true magic is in the everyday, subscribe to my newsletter below for regular doses of enchantment. Want even more inspiration? Follow me on Instagram, Facebook, Pinterest, and Twitter. Here’s to a magical life!

Homemade Beeswrap

IMG_4857.jpg

During my year of buying, using, and wasting less, I focused on reducing my plastic use. I got rid of one-use items and found other methods of storing things, rather than relying on plastics. It wasn’t as hard as I had thought, mostly because I’d stopped using things like plastic wrap several years prior and already reused things like yogurt cartons and other plastic containers (hey, use what you’ve got—it’s better than throwing it out!).

I’d even invested in a few beeswraps over the years, too, although they were pretty expensive to invest in—typically around $20 for three or so beeswax-sealed cloths. So what’s a bruja to do when she’s wanting to find eco-friendly wrappers but not spend a small fortune? You guessed it: Make her own. I went down a Pinterest rabbit hole and found so many easy-to-follow recipes and discovered that not only is making your own beeswrap super easy, it is very affordable. I still have plenty of the ingredients and cotton fabric for when I want to make more—and that ways after making the green living equivalent of a deluxe Tupperware set for two families!

I spent the most money on fancy fabric because I couldn’t help myself! Who can resist avocado or cherry print cotton when you know you’re turning them into useful—and cute—kitchen tools? Plus, I’m a sucker for bright colorful prints in general, from dress patterns to beeswrap, it would seem. Still, you wouldn’t have to do the same. Any old cotton fabric will do as long as it is washed and ironed before you begin their beeswrapping transformation. That’s where the fun begins.

I can’t tell you how much fun I hade making these things. Part of the joy of sustainability is sharing with your family. Last holiday season, I made my family members large sets of beeswrap since I know they, too, are working on better green living practices, but don’t necessarily have the time to whip up a batch of homemade beeswrap. They're better for the environment—and the pocketbook, when making them yourself—and they become a gift that is truly a labor of love.

I have many a fond memory of wintery afternoons spend preparing these reusable wraps by twinkle lights and festive holiday decorations. My home was redolent with the smell of honey and pine for days after. I poured all the softness of honeyed thoughts in the making of them, along with the resiliency of pine resin, both things everyone needs for a new year. I sealed them with my love and the soft healing nourishment of time spent in the kitchen. If that doesn’t welcome in the holiday spirit, I don’t know what does!

Rather than walk you through each and every step I did to make these, I’m leaving you in the good hands of Mommypotomous. I used this recipe because I preferred how she sprinkled the ingredients directly on the cotton, which to me felt easier than melting them separately and painting them on, as Attainable Sustainable did. I also read about the pros and cons of using different ingredients, including vegan options, from Rose Mountain Herbs. They offer quite a few pro tips, too, for getting the exact kind of wrap you want.

IMG_4793.jpg

My supplies: cotton fabric in fun colors, beeswax pastilles (they are easier to use here, providing even coverage), pine resin for stickiness, and jojoba oil to combine the ingredients and serve as an anti-bacterial agent.

IMG_4805.jpg

Washed and ironed cotton cut to size on baking sheets lined with parchment paper. These cotton pieces, with beeswax, pine resin, and jojoba oil, are ready for the oven.

IMG_4795.jpg

These cotton squares are fresh out of the oven and have been brushed to even out the melted ingredients over their surface. Be warned: once they go in the oven, they melt fast and, when you take them out, they harden quickly, so you have to act fast. But don’t worry, you can always pop them back in the oven if you need to reheat them to spread the beeswax mixture around more.

One other little tip: remove the cloth from the baking sheets while they are still warm. If you let them cool on the baking sheets, the excess beeswax mixture will stick to the back of the fabric.

IMG_4858.jpg

The final product! These are great for storing dried goods like doggie treats or snacks on the go, to larger items. The great thing about making your own beeswax wrappers is that you get to choose the size and quantity. I made a variety for me and mine, from small ones, pictured above, to larger ones to wrap up leftovers to everything in between, pictured below. Plus, over time, when your beeswax coat beings to wear off, you simply pop them back in the oven with a little extra beeswax, resin, and oil and let it reseal itself.

IMG_4853.jpg

In the end, me and mine have a gorgeous collection of reusable wraps. Every time I use them, I think of those cozy festive afternoons and warming smell of pine and honey.

Enchantment Learning & Living is an inspirational blog celebrating life’s simple pleasures, everyday mysticism, and delectable recipes that are guaranteed to stir the kitchen witch in you. If you enjoyed what you just read and believe that true magic is in the everyday, subscribe to my newsletter below for regular doses of enchantment. Want even more inspiration? Follow me on InstagramFacebookPinterest, and Twitter. Here’s to a magical life!

Old School Pumpkin Oatmeal Cookies

Fall is finally settling over Albuquerque.  It’s still fairly hot during the day—a whopping 80 degrees—but the mornings are chilly and the sun is setting earlier and earlier, ushering in long cozy evenings making stew, taking in nourishing stories by book or TV, and enjoying a fat mug of apple spice tea.  And while it’s still not completely time to pull out those sweater and fuzzy socks, I find myself craving a batch of these hearty pumpkin cookies.  

I have fond memories of making these cookies every fall growing up.  Inevitably when the leaves started turning, we’d come home from school and eagerly pull out the older than sin Libby’s pumpkin cookies recipe.  Yeah, the 80s add it came form was kind of creepy looking, but it made heallthy-ish, delicious cookies!

I find myself going back to this recipe each season as routine—or ritual—that helps me take in the joy of the changing seasons and welcome in fall.  I got to talking to my mom about this as I began my search for that original recipe she shared so long ago. I went down a Pinterest rabbit hole to no avail, but my mom, the original witchy woman role model, found the original Libby’s recipe online.  We were back in business!  

Alas, neither of us eat that much sugar anymore and the original Libby’s recipe calls for A LOT.  So I adapted my recipe from that old school Libby’s recipe, but cut out a lot of the sugar and butter, with the help of this recipe from Sally’s Baking Addiction (thanks again, mom!).   Like my She Works Hard for the Money Power Muffins or my Energizer Bunny Bars, these cookies are great snacks to hold you over when the day is fuller than usual.  They are also perfectly delicious for a perfectly un-busy day, paired with a good book and a cup of my earthy Autumn Harvest Tea.   Better still, I look forward to sharing this recipe with my little niece and passing on the tradition of making pumpkin cookies every fall.

Ingredients:

3/4 cup pumpkin puree

1 egg

1 tsp vanilla extract

3/4 cup whole wheat flour

1 1/2 cups oats

1/2 cup pepitas

1 tsp grated fresh ginger

1/3 cup brown sugar

1/4 tsp baking powder

1/2 tsp baking soda

1 tsp cinnamon

1/4 tsp nutmeg

1/4 tsp powdered ginger

1/4 tsp cardamom

pinch of salt

Instructions:

  1. Preheat oven 350.

  2. Mix all wet ingredients until blended.

  3. Add in spices and baking soda, powder, and pinch of salt.

  4. Then add in sugar and, once combined, flour.

  5. From there, add in oats and pepitas. The dough should be thick and a little sticky.

  6. Drop a large spoonful of dough onto an unlined baking sheet and press into circular cookies.

  7. Bake for 12ish minutes.

  8. Enjoy! Makes roughly a dozen cookies. I like to store them in the freezer and pull one out for a quick treat.

IMG_8184.jpg

Enchantment Learning & Living is an inspirational blog celebrating life’s simple pleasures, everyday mysticism, and delectable recipes that are guaranteed to stir the kitchen witch in you. If you enjoyed what you just read and believe that true magic is in the everyday, subscribe to my newsletter for regular doses of enchantment. Want even more inspiration? Follow me on Instagram, Facebook, Pinterest, and Twitter. Here’s to a magical life!

Homemade Lip Balm

After all these years—and the countless body butters, scrubs, and makeup items I’ve posted about—I realized I have never once given a recipe for lip balm. Loco! Especially since this is one that I make pretty regularly and one of the first things I learned how to make all those years ago when I was a young girl watching my mom concoct all sorts of cool potions and lotions in our family kitchen.

I love this recipe for so many reasons. It’s inexpensive and easy and keeps your lips kissably soft. I reused my old chapstick tubes or pretty lip balm tins to make them. It’s a great way to avoid mindless consumerism especially if you are participating in Plastic Free July and trying not to buy things with unnecessary packaging. It’s also less expensive to reuse what you have.

And speaking of less expense, instead of paying $1-3 dollars for a small tube of chapstick everyday time I go to the store, I now spend roughly $2 on making over half a dozen lip balms! Plus, I know the ingredients in it and can tailor it to my preferences, which includes plenty of beeswax to seal in moisture.

It takes all of twenty minutes to make—and most of that is spent waiting for the wax and oil to melt and then, once poured into the containers, for them to cool. I make a big batch every few months. My measurements are rough guesstimates. I’ve been making lip balm for so long I’ve gotten pretty good at eyeballing what I need for how many containers. The measurements here will give you a big stash of lip balms to carry around, something I like because I use a lot—and keep some in all the rooms of the house. But you can always cut the recipe in half if you don’t want that much. I add shea butter to my recipe because I find it really helps to soften and hydrate lips. I avoid using essential oils or other scents, because it is on my lips. I also enjoy the soft honey scent it gets from the beeswax.

Ingredients:

1/4 cup shea butter

1/4 cup coconut oil or olive oil

1 tablespoon grated beeswax

Special tools:

saucepan

clean BPA free tin can or other heatproof bowl

cleaned old chapstick tubes or lip balm tins

Directions:

  1. Place the saucepan on low heat and fill halfway with water. Then place the clean tin can in the center of the saucepan. Put the beeswax in the tin can and let melt slowly.

  2. When beeswax is melted, add oil and shea butter. Let sit until combined, about 5-10 minutes.

  3. While oil melts, set up chapstick tubes, making sure that the tube is wound all the way down. If you’re using only tins, make sure they are open.

  4. Remove oil and beeswax mixture from heat and pour into lip balm tubes or tins.

  5. Let tubes or tins sit until the mixture is set, about one hour.

  6. Enjoy! Makes roughly six tubes or tins.

IMG_6950.jpg

Enchantment Learning & Living is an inspirational blog celebrating life’s simple pleasures, everyday mysticism, and delectable recipes that are guaranteed to stir the kitchen witch in you. If you enjoyed what you just read and believe that true magic is in the everyday, subscribe to my newsletter below for regular doses of enchantment. Want even more inspiration? Follow me on Instagram, Facebook, Pinterest, and Twitter. Here’s to a magical life!

Strawberry Moon Juice

The strawberry moon is one of my favorite full moons of the year. It is the solstice moon, quite often, and one that asks us to shed our daily toils and enjoy the long, languid days of summer. I’m especially drawn to it during my year of sacred simple pleasures as it reminds me to welcome sweetness into my life.

So how do you go about doing something like that, you might wonder? Simple. Create space for things that make you feel divine and luscious like a strawberry ripening in the morning sun. Trust our instincts and let go of anything that clouds your skyscape. Allow your energy to open up to possibility. Then, like any kitchen witch worth her salt, you manifest it in what you conjure out of pantry items chopped, shredded, boiled, or stewed into yumminess. Or in this case, stirred.

Seriously! What we whip up in the kitchen is like an edible spell—even if we aren’t using a recipe or thinking of our well-stocked fridge as a medicinal cabinet and our spice cabinet filled with the powders and potions that stir the magic within us.

I’ve been ruminating on this all year and the unintentional energy we conjure in our lives as we choose to hold one thought in our minds over another. What we think, we become as the old saying goes. If that’s the case, I can think of nothing better than thoughts about the warm, lush energy of the Strawberry Moon—except for maybe this drink.

Like all potions, the love and energy you pour into making it is everything. I thought of the tangy surprise of an unexpected adventure as I juiced the lime and a sweet summer romance as I mashed up the berries. Then, as I topped my concoction off with a frothy head of ginger ale, I marinated on the power of spice and heat to liven things up. This is summer in a glass: sweet, spicy, bright, and full of promise.

I personally love Q ginger ale (minimal sugar) or Zevia’s ginger beer mixer (no sugar). I don’t like drinks that are too sweet or ones that give me a sugar rush, so these two options are perfect for a fizzy, spicy drink like my riff on the Moscow Mule. This drink was so good the firs time I made it that it wasn’t until hours later that I realized I forgot to add the vodka! But who needs it when you’re drunk on the heady possibilities of summer? Okay, sometimes I do, and you might want to try this drink both with and without it. Either way, it’s a delicious tribute to the Strawberry Moon and the loving sweetness it brings to summer.

Ingredients:

1 small can ginger ale

1 small lime, juiced

1 medium strawberry, chopped

1 shot vodka (optional)

ice

Muddle strawberries and lime in large glass until fruit is mashed and the liquid is a rosy color. Pour in shot of vodka, if you are wanting a cocktail. Add ice and top with ginger ale. Serves one, so invoke the lusty energy of the strawberry moon and make two. You never know who will arrive on your doorstep. Enjoy!

IMG_6782.jpg

Enchantment Learning & Living is an inspirational blog celebrating life’s simple pleasures, everyday mysticism, and delectable recipes that are guaranteed to stir the kitchen witch in you. If you enjoyed what you just read and believe that true magic is in the everyday, subscribe to my newsletter below for regular doses of enchantment. Want even more inspiration? Follow me on InstagramFacebookPinterest, and Twitter. Here’s to a magical life!

Healthy & Happy Face Toner

One of the joys of a year of sacred simple pleasures has been retooling my beauty routine. I got a fancy new hair cut that makes me feel fabulous. I’ve been doing bi-weekly honey facials (homemade of course!). And I’ve been giving myself regular DIY mani-pedis, without the nail polish since I’ve discovered that I don’t like it as much as I think I do. An earth woman like me spends a lot of time getting her hands dirty and walking around barefoot—not great for polished nails! Still, I like the time and energy I’ve been giving to pampering myself.

In what seems like a self-care cliche at this point, I light a candle, turn on an audiobook, and proceed to indulge in some of the more luxurious forms of taking care of myself. I’m no stranger to the harder forms of self-care—eating right, exercising, limiting stress—but I’ve begun to learn that the softer forms are important too.

I get to feel pretty. And, I’ve found, I like to feel pretty! Like reading romance novels, doing these little seemingly vain self-care things makes me feel like I’m more than a to-do list or a job. I get to be a woman with her own desires and hopes and dreams…corny, I know! But it’s nice to feel like I’m taking care of a part of myself that has nothing to do with my day job (much as I love it). It’s my time for me and me alone, with no outcome except that it makes me feel good.

One of my favorite part of this new beauty regimen has been this Healthy & Happy Face Toner that uses Vitamin C to brighten and tighten skin. I started concocting this new toner after reading an article about how important it is for us bronze-skinned women to include Vitamin C in our skin routine as it helps with sunspots and evening skin tone. It also reduces signs of aging and can stimulate collagen production. I wish I could remember where I read this, so I could provide a ink, but, as one of the delights of this new beauty routine includes reading more beauty magazines (the more natural the better!), I can’t recall where or when I got this information. Ops!

Still, since I’ve incorporated Vitamin C into my toner, my skin has been brighter and softer. Once again, I got inspiration from Wellness Mama, but instead of using witch hazel, I opted for apple cider vinegar, since I find using it in its watered down form has always worked well as a gentle face toner. The vinegar helps balance the ph of your skin and is anti-bacterial. Notice I said watered down, however. Both apple cider vinegar and Vitamin C are acids, which means a little goes a long way. You never want to put undiluted forms of these on your skin as it will be WAY too harsh. So be gentle with yourself and use only watered down versions of each.

I learned from Wellness Mama that Vitamin C (see link below for where to get it) degrades over time so small batches and refrigeration tend to be better. I make a bigger batch myself, since I typically share it with the women in my family. I also sometimes add clove oil for it’s anti-bacterial priorities and to soften the smell of the vinegar. That said, the essential oils are entirely optional—just be sure not to use more than 10 drops, because again, they can agitate the face if they are not properly diluted.

The best part about this toner? It takes less than ten active minutes to make!

Ingredients:

1 tsp Vitamin C powder

1/2 cup water

1/4 cup apple cider vinegar

10 drops clove oil (optional)

Heat water in microwave until almost boiling, about two minutes. Stir Vitamin C power into hot water until dissolved. Allow to cool, approximately 20 minutes. Then add the apple cider vinegar and stir. Store in small mason jar or petite spray bottle.

To use, wash face thoroughly then dip (ideally reusable!) cotton swab in liquid or spray toner onto swab into moist but not overly wet. Wipe face with cotton, spending a little extra time on oily or problem spots. Let dry then apply moisturizer of choice.

Makes 3/4 cup. Use within the month or keep in fridge to extend the shelf life. Enjoy!

….just add water!

….just add water!

Enchantment Learning & Living is an inspirational blog celebrating life’s simple pleasures, everyday mysticism, and delectable recipes that are guaranteed to stir the kitchen witch in you. If you enjoyed what you just read and believe that true magic is in the everyday, subscribe to my newsletter below for regular doses of enchantment. Want even more inspiration? Follow me on InstagramFacebookPinterest, and Twitter. Here’s to a magical life!

Beet Carpaccio

I love beets. They are second only to the humble radish, whose peppery bite will always be my first love…in terms of root vegetables, that is. But what the radish has in spring spice, the beet makes up for in earthy, meaty sweetness. And like the radish, the humble beet is best when you don’t do too much to it.

This recipe for beet carpaccio came about because I had purchased the most beautiful beets and meyer lemons from my local store. I swear, the lemons looked so big and juicy I thought they were small oranges! The eye-popping color of both produce items had me thinking of a tasty jewel-toned dish that would work as a Saturday night salad or starter.

…and you all know I’m always working on making my lifestyle more and more green, including in my cooking. Eating little or no meat is one of the best ways to cheaply and effortlessly help the planet. While I’m not a complete vegetarian, dishes like this, a play on the classic beef carpaccio, make me love being a veggie eater.

Meyer lemons are only in season so long, so if you can’t get them, regular lemons will do, as will oranges, if you want to play around with other citruses to get different flavors for your carpaccio. Just make sure you use organic produce (as always), especially because you will be using the zest. Non-organic citrus means you’ll be sprinkling pesticides in your salad as well as zest, yuck! I used pistachios in place of capers found in the traditional carpaccio, both to mimic the color of the brined berries and to add a touch of nuttiness. The homemade salt combo is what really ties the flavors together, however. The mustard, orange, and onion act as a savory sweet balance to the tart citrus.

Did I mention I love the colors of this salad? The dark red of the beets, the pop of green from the pistachios, and the sprinkle of yellow from the lemon zest…it’s a work of edible art, perfect for a fancy Saturday night dinner (in your jammies, natch).

Ingredients:

For salt:

1 tablespoon himalayan rock salt

1 tablespoon mustard seeds

1 tablespoon dried onion

1 tablespoon dried orange peel

For Salad:

1 medium beet

1/4 cup chopped pistachios

1 tablespoon lemon zest

Juice of 1 lemon

olive oil

1. Heat water in two quart sauce pan until boiling.

2. While water boils, wash and peel beet. Place in hot water and boil until soft, about 20 minutes. Remove from water and let cool, at least an hour. Then place beet in the fridge and let chill for a few hours. I like to cook my beet in the morning and then pop it in the fridge until dinnertime.

3. While you let the beet chill, combine ingredients for salt and place in salt mill or use a mortar and pestle to grind. Note: You will have more of this salt than is necessary for the recipe. Trust me, this is a good thing. It stores indefinitely and is great on all sorts of dishes, from a tangy citrus chicken to summery roasted veggies.

4. When beet is fully chilled, use a mandoline or sharp knife to cut paper thin slices of the beets. The mandoline is a little easier for this. If yo use the knife, the slices won’t be uniform (unless, of course, your knife skills are better than my so-so ones!).

5. Arrange slices in circle formation on two plates and drizzle with olive oil and lemon juice.

6. Then sprinkle a smattering of your fancy salt, to taste (I like it easy on the salt, myself).

7. Finally, add the lemon zest and pistachio pieces to each plate.

Eat immediately. Serves two. Enjoy!

IMG_5133.jpg

Enchantment Learning & Living is an inspirational blog celebrating life’s simple pleasures, everyday mysticism, and delectable recipes that are guaranteed to stir the kitchen witch in you. If you enjoyed what you just read and believe that true magic is in the everyday, subscribe to my newsletter below for regular doses of enchantment. Want even more inspiration? Follow me on InstagramFacebookPinterest, and Twitter. Here’s to a magical life!

Butternut Squash Steaks

I don’t know what it is about January and February, but I always find myself tinkering more in the kitchen this time of year, trying new healthy recipes.  Maybe it’s the cold winter nights, maybe it’s the promise of spring and new things on the horizon, or maybe it’s just because I love the idea of trying something that shakes up my routine.  In any case, I find that there’s nothing better come Saturday night than an old jazz record, a beautiful cocktail, and a crisp apron as I go about trying something new.  

One such evening produced this lovely recipe for butternut squash steaks.  Like my cabbage steaks, this dish is warm, hearty, and healthy—for you and the planet (one of the easiest ways to be eco-friendly is to eat less meat).  It’s also incredibly versatile and relatively low-maintenance, once you get past the peeling and slicing part. For this recipe, I went old school and seasoned it with garlic and rosemary, but I have plans to try other more adventurous combos, like tarragon and shallots. 

You will mostly be using the longer top part of the squash for this to get the “steaks,” but I recommend dicing up the remainder of the veggie and cooking them for a future quick lunch with tossed with lettuce and garbanzo beans or boiling to use as a puree for soup.  You can do a quick roast of the seeds in a frying pan—no cleaning needed, just let the pulpy matter get nice and crispy.  Yum!  Go ahead and toss the remaining scraps in your compost—your worms will thank you and so will your garden.  I’m all about reducing kitchen waste!

This squash is great on its own on a bed of lettuce (pictured here) or paired with a more elaborate meal for date night, with a side of green beans and mashed potatoes if you want to mimic the full steak dinner.  

Ingredients:

1 medium butternut squash, washed

2 cloves garlic, minced

1 tablespoon fresh rosemary, chopped

salt to taste

olive oil

  1. To prepare, cut off the top and bottom parts of the squash, no more than a quarter of an inch.  Using a vegetable peeler, peel off the hard outer skin.   Then cut bottom rounded part off and set aside (see above for ways to use those remaining pieces).

  2. Lay butternut squash on its side and carefully slice it into 1/3 to 1/2 in slices, depending on how thick you want your steaks to be. 

  3. Rub steaks in olive oil, garlic, rosemary, and salt tot taste and let sit for twenty minutes.

  4. While steaks marinate, heat olive oil in saucepan on medium.

  5. Place 2-3 steaks in sauce pan (the number depends on how big your squash and pan are).  Let cook on one side for 5-7 minutes, until browned and softened.  Flip steaks and do the same for the second side.  Repeat until all steaks are cooked.  

  6. Serve on a bed of lettuce and drizzle with olive oil.  Makes 4-6, depending on how thick your steaks are.  Enjoy!

IMG_5033 (1).jpg

Enchantment Learning & Living is an inspirational blog celebrating life’s simple pleasures, everyday mysticism, and delectable recipes that are guaranteed to stir the kitchen witch in you. If you enjoyed what you just read and believe that true magic is in the everyday, subscribe to my newsletter below for regular doses of enchantment. Want even more inspiration? Follow me on InstagramFacebookPinterest, and Twitter. Here’s to a magical life!

Homemade Doggie Treats

When I say I like to make gifts for everyone in my family, I mean everyone, including the pups. (Okay, okay, lest that last statement sound too Martha Stewart-y, I should say that I’ve got a small family and we’re all pretty chill about the gift thing—but it’s still fun to treat them to some creature comforts!). I’m auntie to several cute doggies and friends with many a lovely dog owner and I love to spoil our four-legged friends with some easy and healthy treats this time of year. Bonus: making my own treats means not purchasing things with wasteful packaging, yay!

IMG_4812.jpg

I modeled my recipe from one by Bitz & Giggles because I loved how adaptable versatile it was (also easy, because…you know me). The pumpkin puree can easily be swapped out for apple sauce, as my experiments have proved, and I’ve incorporated many a batch of apple-studded and chia-seed smattered oatmeal that I knew I wouldn’t be able to finish into these treats. I’ve even added yogurt in a pinch. I omitted the nutmeg and cinnamon, because, as their recipe states, those spices can be harmful to dogs in large amounts, so I didn’t want to mess with it. I also added a mix of white and wheat flour—enough to soak up the extra moisture from the cook oatmeal I mixed in.

You are not required to buy a doggie bone cookie cutter to make them. I did just because I think it’s cute and because I once tried to use festive holiday cookie cutters…but everyone kept mistake the doggie teats for human cookies. Ooops! You can slice the dough into squares if you want or use less human-being-y cookie cutters (or just be prepared for people to gobble a few of these healthy treats too).

You'll notice my recipe is a little iffy on the ingredients because I’m all for using what you have on hand. I make a bigger batch so I have plenty to give out, but you could always cut it in half. See what I mean about versatile? I would still cook them for a solid 40 minutes so they harden like a traditional doggie biscuit. I only did 30 minutes for the first round and they came out cookie-soft. Play with it and see what works best for you. All in all, these are fun to make and share with you furry friends. Plus it is super easy to whip up before the holiday celebrations and pop into the freezer for later gift-giving.

Ingredients:

1 cup canned pumpkin (or apple sauce)

1 cup water (or yogurt)

1/4 cup olive oil or coconut oil

1 cup oatmeal

4 cups white or wheat flour

Preheat oven 375. Pour wet ingredients in bowl and stir until combined. Then slowly add flour and oats until dough forms. If you’re trying to use up already cooked oatmeal like I did, then just mix it in with the wet ingredients, and add the flour after. Roll out to 1/4 inch thickness on floured surface and use your cookie cutter or knife to create shapes. Place on baking sheet and bake for 40 minutes. Serves an entire pack of wolves. Enjoy!

IMG_4813.jpg

Enchantment Learning & Living is an inspirational blog celebrating life’s simple pleasures, everyday mysticism, and delectable recipes that are guaranteed to stir the kitchen witch in you. If you enjoyed what you just read and believe that true magic is in the everyday, subscribe to my newsletter below for regular doses of enchantment. Want even more inspiration? Follow me on InstagramFacebookPinterest, and Twitter. Here’s to a magical life!

The Occult Detective...with a Cocktail Recipe!

Each November, I love to write about stories that inspire, nourish, and delight.  I think this is the perfect month for setting aside more time for reading.  Autumn is well under way.  The days are colder and shorter.  The sanctuary of our homes calls to us as we settle into this contemplative month.  We are drawn to quieter past times that give us space to reflect and heal.

Over the years, I’ve written about the important comfort good stories and other simple pleasures can offer us and the power various genres have to impart wisdom.  This year, I’m waxing poetic about the Occult Detective…with a cocktail recipe thrown in, because I’m a big ol’ nerd like that.  

Introducing the Occult Detective 

So what are occult detectives?  They are usually rough and tumble characters dealing with the darker side of life.  Ghost hunters, if you will.  Vampire slayers.  Paranormal investigators.  Monster fighters.  And those drawn to the arcane knowledge of the occult and mystical. 

This archetype is found in everything from Buffy the Vampire Slayer and all other monster of the week TV shows, to urban fantasy like the Dresden Files and the Bone Street Rumba series.  But what most people don’t know (unless you are a diehard occult detective fan like me!) is that this genre has a long history dating back to the Victorian Era. The 19th century saw not only the birth of the detective genre, but also the fad of Spiritualism.  Popular culture at the time was obsessed with understanding, studying, and experiencing the otherworldly via séances, spirit photography, and extensive research into the occult…much like we are today.

The Age of Spiritualism brought us the likes of Thomas Carnaki, inventor of the electric pentacle; Flaxman Low, a self-proclaimed supernatural detective; and, Diana Marburg, a palmist who solves murders.  Then there’s Dr. John Silence, the first Victorian occult detective I ever read about, who will always have a place in my heart for introducing me to the genre.  He has a mysterious past, training in the occult, and cool animal helpers like his cat Smoke and his dog Flame. 

At their best, these stories explored our relationship to the otherworldly and our curiosity about things outside ourselves.  They show how we grapple with the mysterious, unseen forces in this world (and beyond!), the things that often reach out in touch us in our life but that we can’t always explain away or even logically process…at their worst, we get ugly things like sexism, xenophobia, and racism.  The supernatural becomes a catch-all terms for anything that isn’t white, hetero, middle-class, or male, and thus, to be feared.  Yikes!  

A Genre of Transformation

My favorite part about this genre is that is has transformed over the centuries from a genre of xenophobia to one of hope and empowering explorations of otherness. Women, people of color, LGTBQ+ communities, people with disabilities, and, yes, supernatural beings are front and center in contemporary additions to the genre.  We’ve got Maggie Hoaskie, a Navajo monster hunter in Trail of Lighting; Tony Foster, a gay wizard in Smoke and Mirrors; Kate Daniels, a magical mercenary and woman of color in a post-apocalyptic world; the canonical bi-sexual John Constantine; and many stories out of Occult Detective Quarterly that aims to make the genre more inclusive by representing both diverse characters and authors….just to name a few.  And that’s barely scratched the surface.  I mean, I haven’t even gotten into TV shows yet (I’m talking to you, Sleepy Hollow, Wynona Erp, Supernatural, Lucifer and. So. Many. Others).

Perhaps what I love most about this genre is that it’s all about how magic is a hard, gritty thing.  In one way or another, these stories are about what it takes to be true to yourself in a worlds that doesn’t like marginalized bodies, otherness, and those living on the social periphery.  Better still, these stories teach us that living within liminal spaces—not just a human but a werewolf (Kitty Norville), not just a woman but a witch (Persephone Alcmedi), or a half-dead resurrected inbetweener (Carlos Delacruz)—is empowering, transformational even.  This liminal space we occupy is the crack where the light seeps in.

In the end, this genre, and the occult detective archetype, doesn’t just grapple with the paranormal, but perhaps the even more inscrutable concept of what it means to be human…even when you’re a ghost, werewolf, or technically undead. 

The Recipe

All which means that this genre deserves a drink and so do you!  I thought about pairing various stories with treats and drinks, but really, there are so many manifestations of this archetype, from cozy mysteries like the Juliet Blackwell’s Witchcraft series to dark horror like Mike Carey’s Felix Castor books.  I even thought of making a cocktail called the Hellblazer…before I realized that would just be a bottle of Jack and a pack of cigarettes. 

So I came up with a cocktail that captured the spirit (pun intended) of the genre instead. This is a riff on the Manhattan, using Amaro liquor instead of vermouth.  Amor is an intensely herbaceous, bitter Italian liquor, there perfect nod to hellfire and brimstone, two things any occult detective worth their salt should know how to handle.  Then add a dash of burnt orange bitters for a touch of the ghostly (though regular orange bitters would do just a well), and another dash of cinnamon bitters as the sin that warms your bones and promises a slew of bad—but delicious—decisions.  Bourbon holds it all together, balancing the punch of Amaro and bitters with the fullness of vanilla and earth—the underlying hope and hard-earned sweetness inherent in the genre.

This drink is perfect after a hard day of proverbial monster hunting or an even longer night of literal vampire slaying. 

Ingredients:

.5 oz Amaro liquor 

2 oz bourbon

2 dashes burnt orange bitters

2 dashes cinnamon bitters

ice

Mix ingredients in a shaker and shake for one minute.  Pour into a martini glass.  Garnish with a cinnamon stick, orange peel slice, .and the ashes of the demons you’ve slayed—cinnamon stick and orange peel slice optional.  Pair with a dark and stormy night and any of the occult detective stories mentioned here or pictured below.  Serves one.  Enjoy!

IMG_4320.jpg

Enchantment Learning & Living is an inspirational collection of musings touching on life’s simple pleasures, everyday fantasy, and absolutely delectable recipes that will guarantee to stir the kitchen witch in you.  If you enjoyed what you just read and believe that true magic is the everyday, subscribe here.

Want even more inspiration to make your dream life a reality?  Follow me on FacebookPinterest, and Twitter.  Thanks for following!

Witch's Brew Cocktail

It’s been awhile since I’ve concocted a cocktail recipe, and even longer since I’ve come up with one for Halloween.  I love a good cocktail because they’ve always struck me as one of the most basic kind of potions.  Think about it: a good cocktail can give us liquid courage, exorcise a hard work week, or even act as a temporary love spell.  And as will all potions and spells, the medicine is in the dosage.  Too much and it’s poison, too little and your Friday night is perhaps a little less adventurous (wink wink).  

It bears repeating that I like to avoid syrupy or excessively sugary ingredients and stick to clean tastes modeled after the classics when it comes to cocktail making.  I do this because most novelty cocktail—a la Halloween drinks—are sugar bombs.  Not my idea of a good time or a tasty drink. Although I call these Halloween-inspired concoctions, I have been known to drink the throughout the year, especially the green fairy, a tasty absinthe-kissed cocktail perfect for ending the workweek and stirring up some writing inspiration for the weekend.

Lately, come Saturday night, I’ve been experimenting with this new drink: Witch’s Brew.  It was inspired by my garden and all the herbs I cultivate there: rosemary, lavender, sage…all delicious, all medicinal, all typically associated with healers and witches because of their various magical and healing properties. I started wondering how I could fold those flavors into a tasty magical brew.

I used gin as the base because of herbaciousness and went for a bold choice of mixer: chartreuse.  It’s what gives this drink the verdant green color we typically associate with potions.  It’s also an ancient healing tincture made from over 130 herbs. It tastes fresh, like mint and fennel, with the other herbs as a strong supporting cast.  Yum! I paired this refreshing taste with lime because I love a good gimlet and its variants.

The real kicker to this is what I do with the gin. I infuse it with green apples—who doesn’t think of witches without thinking of forbidden fruit?—along with rosemary and a few juniper berries to make the herbaciousness of the gin really pop. Also because I love rosemary, the natural protector of the herb world. Juniper berries are also fast becoming a kitchen witch staple in my home. Did you know juniper both protects good energy and repels the negative? If that’s not magical, I don’t know what is! Add a dash of bay leaf bitters, for the leaf’s powers of divination.

As with all spells (and drinks), feel free to play with the recipe. Chartreuse might be a bit pricy for some (though a little goes a long way so it will last a while!), try swapping it out with rosemary or ginger simple syrup or apple schnapps (or both!)—it will change the flavor, but will no doubt be equally festive, if with more sugar. The infused gin makes about two cups of yum—plenty to experiment with or to whip up a magical batch of this brew.

All good spells require a little time, a little love, and quality ingredients. While this cocktail is a touch more labor-intensive than my others in that you first need a week to infuse the gin, it’s worth it. Plus, while you wait, you can prepare the right kind of energy you want to infuse into this brew. Do you need a little more magic in your life? A little more mischief? A dash of hope or a heading dose of healing? Whatever you need, let it brew until you’re ready to infuse it into a batch of this tasty elixir.

Ingredients:

For infused gin:

2 cups gin

1 Granny Smith apple

2-4 juniper berries (depending on how strong you want the juniper flavor to be)

1 large spring of rosemary

For cocktail:

2 oz apple and herb-infused gin

2 dashes bay leaf bitters

.75 oz chartreuse

.5 to .75 oz freshly squeezed lime juice (depending on how tart you like it)

In infuse gin, slice green apple and place in clean mason jar. Squeeze juniper berries so they crack a little—this will help the alcohol absorb their flavor more—and place in jar. Pour gin over ingredients and let sit for a week, shaking when you remember to. A day or two before you want to enjoy your cocktail, throw in a sprig of rosemary that has been slightly bruised, again, to help the alcohol better absorb its flavor. I wait a little on the rosemary because the fresh stuff takes less time to be extracted in alcohol and letting it sit too long in the gin muddies the flavor. To use, pour gin through strainer into clean mason jar.

For cocktail, mix gin, chartreuse, lime juice, and dash of bitters in a shaker. Add ice and shake until container is frosty. Serves one—so double or triple the batch and invite your coven over. Pair with a chilly autumn night, a full moon, and a handful of spells. Cauldron optional.

IMG_3865.jpg


Enchantment Learning & Living is an inspirational blog celebrating life’s simple pleasures, everyday mysticism, and delectable recipes that are guaranteed to stir the kitchen witch in you. If you enjoyed what you just read and believe that true magic is in the everyday, subscribe to my newsletter below for regular doses of enchantment. Want even more inspiration? Follow me on InstagramFacebookPinterest, and Twitter. Here’s to a magical life!

Homemade Mineral Foundation

I don’t wear a lot of makeup and lately, I’ve been going more and more natural.  When I do wear makeup, I want it to be as organic as possible.  The only issue with that, of course, is that organic makeup can be super expensive and still full of yucky ingredients. It’s better than the drug-store makeup but when I learned that many brands sneak in various preservatives and no-no additives to products that are supposed to be cleaner than your average makeup. 

That got me thinking: why am a paying a small fortune for “organic” makeup if it isn’t as pure as I thought?  I’ve also become more aware of the waste involved in buying tiny one-ounce products and then having to throw away the used compact or jar once I’ve used up the foundation.  I am trying to buy, use, and waste less this year, after all.  

Sure, I could go makeup free, but sometimes I need a little coverage.  It’s akin to putting on armor for a workday or adding a touch of glamour when I want to go out and feel pretty.  Then it hit me: I’ve gone full-on hippy homemaker in the past and made my own mascara and bronzer, so why not make my own foundation?  It would be cheaper, less wasteful, and I would always be sure I got the right tint.

Let me tell you right now that this journey has been a process.  I started with recipes I found online that said you could make your own foundation using only arrowroot powder and kitchen spices.  Sold!  How much more natural could a woman get?  Alas, if it sounds too good to be true, then it probably is.  I tried various recipes, various amounts of cinnamon, nutmeg and arrowroot powder, and it still always came out looking like I had dusted spices on my face.  At least I smelled like freshly baked goods!

That’s when I turned to mineral makeup.  Technically, you can’t call anything like minerals that are pulled from the earth organic, because we can’t control the elements. It’s kind of like the same way you can’t call fish organic, only line-caught, because, as they swim around in the ocean, they can come into contact with all sorts of matter.  Still, it’s as natural as you can get—like the bronzer I made. 

Some people worry about using titanium dioxide in this mix, but I figure if it’s in the store-bought mineral products I buy and wear, I should be fine.  It’s the unpronounceable things on the list of ingredients that worry me. From what I found on my research, the only danger in titanium dioxide is in using the nanoparticles version where the particles are so small you can absorb more than is good for you, similar to how you should always use non-nano zinc oxide for your homemade sunscreen.  

Okay, enough of the technical talk!  Let’s get to the recipe.  I love it!  It took me all of ten minutes to make and looks and feels wonderful.  There’s an initial investment in buying bulk supplies (I spent roughly $60 on ingredients).  But once you have them, you’ll never have to get more for a VERY long time (and FYI, the ingredients never go bad).  I adapted my recipe from Natural Organic Products & Recipes and The Humble Homemaker.

I cut my portions in half because I like working in small batches until I know how something will work out.  Even with my half-batch, I used a few dollars worth of the ingredients and ended up with several ounces of makeup—at least ten times the amount of the small jars and compacts that you shell out $25-$40 for.  What?!  I know.  Totally worth the investment.  At this rate, my half batch will cover me for a few years and then I have plenty of raw ingredients for when I need more.  Dare I say that my $60 investment will last a lifetime?  Maybe not that long, but it sure beats shelling out half that every six months for an ounce of makeup in a container I ultimately have to throw away.  

The last thing I’ll say about this is that, of course, not all skin tones are the same.  My recipe is for olive skin tones, but this fabulous website has the list of ingredients and measurements you’ll need for other skin tones.  Play with it to see what works for you.  I ended up leaving out the clay in their instructions as well as a few other ingredients from The Humble Homemaker because they didn’t feel necessary to me.  Do make sure to purchase a coffee grinder that you use ONLY for makeup and similar DIY products and be careful not to breathe in the ingredients while you mix them (I like to tie a damp cloth around my nose and mouth to be safe).  

Ingredients:

5 tsp titanium dioxide

1/2 tbsp serecite mica

2 tsp zinc oxide

1/2 tsp magnesium stearate

3/4 tsp brown iron oxide

1/8 tsp deep red oxide

5 tsp yellow iron oxide

Mix ingredients in bowl reserved only for makeup and similar DIY projects.  Stir until combined.  Then, in small batches, blend in coffee grinder (again, making sure that this is one you use only for these types of projects).  As you finish each batch, pour into reusable container like a mason jar.  Shake jar to combine each batch you’ve run through the coffee grinder.  Store in a cool, dry place. 

To use, place a small amount in an old cosmetic container and, using your blusher, dust your face with desired amount.  If you don’t have a small container that you can reuse, simply keep in the foundation in the larger jar and be sure to shake the blusher before applying to remove any excess powder.  

Note: If foundation looks too dark, add more titanium dioxide in small amounts.  

Makes roughly 8 oz

IMG_3710.jpg


Enchantment Learning & Living is an inspirational blog celebrating life’s simple pleasures, everyday mysticism, and delectable recipes that are guaranteed to stir the kitchen witch in you. If you enjoyed what you just read and believe that true magic is in the everyday, subscribe to my newsletter below for regular doses of enchantment. Want even more inspiration? Follow me on InstagramFacebookPinterest, and Twitter. Here’s to a magical life!

Homemade Shampoo & Facial Cleanser

It’s official, I’ve gone off the hippy-DIY deep-end.  Actually, it happened a long time ago when I started making my own shampoo and facial cleanser!   I know, every time you think I couldn’t possibly be any more tree-huggery, I confess that I’ve been doing something like making my own shower products for years.

I started for a multitude of reasons, the biggest being that I have thick crazy hair that doesn’t respond well to most conventional shampoo products and sensitive skin that gets easily irritated with the various chemicals used in most facial cleansers and soaps.  Even when the organic specialty products promised extra-hydration for dry locks or gentle formulas for sensitive skin, none of it worked.  I ended up spending a small fortune on organic products that did nothing for me but give me brittle hair and dry skin.

I’ve learned over the years that simpler truly is better.  Tired of expensive, useless products, I finally tried this very simple recipe from who knows where (it’s been long enough that I can’t actually remember how I got started on this, probably from a magazine or book):  Diluted castile soap with your choice of essential oils. 

What?! That’s it? Yup.

I tried it over five years ago and have never gone back.  Gone are the pile of shampoo bottles and jars of face soaps clogging my shower caddie and putting a dent in my wallet.  Instead, I have two repurposed honey-bear bottles—the large one for shampoo and the smaller for my facial cleanser. 

Since I’ve switched to using castile soap as the foundation for both my shampoo and face soap, my skin is happier and my hair more hydrated.  The trick is to make sure that you are, in fact, properly diluting castile soap.  One of the things that can make Dr. Bronner’s soap seem expensive is that it is highly concentrated, which means it should never be used without diluting it.  Once you do that, you understand that while it can seem pricey, a little goes a very long way! 

Another perk to this recipe is that is reduced the amount of packaging you buy then throw out—so say goodbye to the wasteful packaging of all those shampoo bottles!  Repurposing old bottles and purchasing castile soap in bulk from your local co-op, using your own container to fill up, lets you go that extra mile in waste reduction.  When all is said and done, you end up spending mere pennies on shampoo and face wash.  

The only real difference between the shampoo and face wash is the amount of essential oils you put in.  Because the skin on your face can be very sensitive, only use 5-10 drops in your mixture.  That’s enough to get the healing benefits of the oils without an irritation.  For your shampoo, you can use more.  When in doubt, use less essential oils than you think you need.  Like the soap, a little essential oil goes a long way!

Last but not least, I have a few optional ingredients you can throw in for an added boost of nourshiment and cleansing, but they aren't necessary.  Experiment and see what works for you.  That's half the fun of DIY-ing your beauty routine, after all! 

Basic Ingredients:

Castile soap

Water

Optional Ingredients: 

Essential oils of choice

Honey

Activated Charcoal (for facial cleanser only)

Olive Oil (for shampoo only)

For Shampoo: 

Combine 1/4 cup castile soap with 1 cup water.  Add 15-20 drops essential oil of choice.  I like to use rosemary because it makes your hair shinier, peppermint, or cinnamon to boost growth (it also smells really nice!).  If that said, if you have sensitivities to scents, you can always omit the oils.

Other things you can add to your shampoo are honey (approximately 1/4 cup) or olive oil (1/4 cup) to hydrate your locks and help them retain moisture.  (If your hair is very dry, consider using my Goddess Hair Mask once a week.)

Combine ingredients in your repurposed container and shake until combined.  To use, pour desired amount on wet hair, lather, rinse, and repeat.

Makes approximately 1-1 1/2 cups.

For Facial Cleanser:

Combine 1/4 castile soap with 1 cup water.  Add 5-10 drops essential oil of choice.  I love clove oil because it is anti-bacterial.  You can add a teaspoon of honey to lock in moisture and provide additional anti-bacterial help.  Or you can mix in a teaspoon of activated charcoal to clean pores and purify skin. 

Combine ingredients in your repurposed container and shake until combined.  To use, pour a dime sized amount into your hand and gently massage into wet face.  Rinse.  

Makes approximately 1 cup.

Enjoy!

IMG_3706.jpg

Enchantment Learning & Living is an inspirational blog celebrating life’s simple pleasures, everyday mysticism, and delectable recipes that are guaranteed to stir the kitchen witch in you. If you enjoyed what you just read and believe that true magic is in the everyday, subscribe to my newsletter below for regular doses of enchantment. Want even more inspiration? Follow me on InstagramFacebookPinterest, and Twitter. Here’s to a magical life!

Homemade Beeswax Candles

I love beeswax.  I use it in everything, from my body butters and lip balms to salves and mascara.  It acts as a sealant in my beauty goodies, locking in moisture and providing a protective layer against the elements. Plus it smells divine!  Like honey and warm earth. Best of all, buying local beeswax supports the bees which we need for a thriving planet and happy garden.

Homemade Beeswax Candles

I've fallen in love with beeswax all over again, recently, after I began making these homemade candles.  I adore candles.  Their dancing light turns dinner into a celebration or nighttime reading into a cozy retreat from the world.  Their open flames seem made for whispering wishes into and their warm glow chases away the darkness like no lamplight can. In short, they are one of my sacred simple pleasures.  I enjoy the homey task of making them, especially last week, as I cleaned and prepared my home for the coming summer solstice and enjoyed a candlelit night once the sun set on the longest day of the year.

Beeswax candles are one of the purest candles out there, free from yucky chemicals and artificial ingredients of mainstream candles. They have the added benefit of purifying your home.  While most candles actually release toxins into the air while they burn, beeswax candles release negative ions as they melt which neutralizes the positive ions create by allergies and other pollutants.  Bonus: It makes your home smell like amber, soft and sweet, like the honey it comes from.

These homemade candles are ridiculously easy to make, as are all my recipes, natch.  I prefer to use old toilet paper rolls for pillar candles and egg cartons for tea lights, rather than pouring them into jars.  The jars are nice, but I hate the build-up of candle containers; plus, I just love the look of pillar candles. Feel free to use jars if you prefer them (or reuse old candle tins).

These candles make wonderful gifts.  I like to make a big batch since they are so easy to make, to have on hand for last-minute gifts or give to my family.  Once the wick on your candle has burned down, don't throw the wax out! Use it to make new candles.  Beeswax is super durable and long-lasting, so you can just keep reusing what doesn't get burned up.  This recipe also works well for any candle wax you've got lying around.  I melted down one of my favorite chakra candles and refashioned it into a new one.  It beats spending a small fortune on new candles!

I've made my beeswax candles two ways: with just the beeswax and with a little coconut oil thrown it.  The pure beeswax candles emit a softer, lighter glow, while the ones with coconut oil burn brighter and faster.  If you use a jar, you will for sure want to use coconut oil so that you can more easily remove leftover wax once the candle is done burning.

Ingredients:

Beeswax, preferably local

Coconut oil (optional, using only 1 part oil to 4 parts beeswax for best consistency)

Special Tools:

Toilet paper or paper towel rolls

Egg cartons

Large tin can

Old saucepan

Organic candle wicks

Parchment or wax paper

Baking sheet

Skewers or string (to keep wicks straight)

To make, roughly chop wax and place in the large tin can.  Fill saucepan halfway with water and place on stove.  Put can in saucepan.  Burner should be on medium heat.  Stir occasionally until wax melts. The time on this varies, depending on how much beeswax you use and how small the wax pieces are. It will take at least twenty minutes. I typically put it on when writing so it can melt while I work.  

If you are using coconut oil, melt it in a separate tin can only once your beeswax is melted, as the coconut oil melts more quickly.  Once it's melted, combine with the wax and stir. 

Remove melted wax from heat and let sit about five minutes to cool.  While your wax (and coconut oil, if you are using it) is cooling, spread parchment paper across a baking sheet and line up your paper rolls.  You can also use the bottom of an egg carton if you want smaller candles. 

To make candles, pour a dime-sized bit of wax into the bottom of the rolls sitting on parchment paper or in the egg cartons.  Then place the metal bottom of your wicks into the wax.  This will serve as a solid base. Once you've done it for all your candle molds, line one or two skewers or other straight objects across the middle of your rolls (or carton) so that your wicks are neatly sandwiched between them.  This will ensure that they stay centered.  For smaller candles, simply cut the desired wick size and place it in the cooling wax. 

Candle Making Process

Pour wax slowly into molds.  Note: If the wax isn't cool enough, it may leak out of bottom rolls, so make sure it has enough time to cool.  I forgot to the first time I made these and had wax puddles forming outside the molds--luckily I could just let it harden, scrape it off, and remelt it!  

Wax in Egg Carton

Once the beeswax is poured into the molds, let them sit until hardened, usually an hour or two.  I keep them on the baking sheet so that I can move them someplace where they won't be in the way.  Once they've hardened and cooled, simply peel away the carton or roll and you've got yourself a lovely collection of beeswax candles!

Finished Candles

Enchantment Learning & Living is an inspirational blog celebrating life’s simple pleasures, everyday mysticism, and delectable recipes that are guaranteed to stir the kitchen witch in you. If you enjoyed what you just read and believe that true magic is in the everyday, subscribe to my newsletter below for regular doses of enchantment. Want even more inspiration? Follow me on Instagram, Facebook, Pinterest, and Twitter. Here’s to a magical life!

Vegan Bacon Recipe

I know, I know. Vegan bacon is a total oxymoron! Strange name aside, I can promise you that it tastes delicious. I began my quest for healthier breakfast sides after I realized this past winter that I was eating more and more bacon come the weekend which was bad for my waistline and health. Then I realized what I really loved about bacon is that it made me feel fancy. Breakfast could be a decadent diner plate with scrambled eggs, buttery toast, and yes, bacon. 

So then the quest began. How do I make a healthier weekend breakfast side? I was inspired by these recipes from Minimalist Baker and Veganosity, but as always, modified them so that I didn't have to buy any special ingredients--those things that usually end up getting used once and then thrown out (yet another attempt for me to waste less is to buy only condiments and ingredients I know I'll use). An added bonus to this recipe? Eating less meat is better for the environment all around, not just for your health.

Typically I avoid most things called vegan because they end up being highly processed. I would also rather eat something that tastes like what it is, like tofu for example, rather than beef flavored tofu. I mean, how many gross additives and artificial ingredients go into making fake meat? Yuck! All that artificial stuff is hardly good for the environment either. There are, of course, a few exceptions, like this bacon and my vegan fudge, both of which use only natural ingredients and only foodstuff that I already have in my pantry: maple syrup, amino acids, garlic, and chipotle chile powder. Together these ingredients make for a sweet smokey flavor akin to bacon. If you have never used amino acids before, give them a try! I started using Braggs liquid amino acids as a healthier substitute for soy sauce and haven’t looked back since. 

This recipe works well with eggplant (pictured here) as well as mushrooms. I have even seen people use carrots and turnips, though I have yet to try those options. You can slice these longways or, as I prefer, in circular discs. The big thing you need to make sure you do is to use a mandolin or other sharp cutting tool to produce thin, even slices so your pieces cook evenly. If they are too thick, they won’t have that crispy bacon feel.  

All in all, this vegan bacon is the perfect blend of crispy, salty, and smokey--and it goes great with scrambled eggs and toast! 

ingredients: 

1 eggplant, thinly sliced  

1/4 cup Braggs liquid amino acids

1/4 cup maple syrup

1/2 tablespoon smoke chipotle powder

1-2 cloves garlic, minced

Combine all ingredients, except the eggplant, in a shallow pan or bowl. Then place eggplant slices in mixture and let marinate at least 30 minutes. I usually let them marinate overnight for best flavor. To cook, squeeze the moisture from eggplant piece so they are as dry as possible. This will ensure that they get crispy while cooking, not soggy. Heat oil in frying pan on medium. Once the pan is hot, place first round of eggplant on pan’s surface and cook without flipping for 1-2 minutes, watching carefully so that pieces crisp up, not burn. Flip pieces and repeat on the second side until browned. These are best eaten hot with scrambled eggs and toast. Serves 4-6. Enjoy!

Eggplant Dish

Enchantment Learning & Living is an inspirational blog celebrating life’s simple pleasures, everyday mysticism, and delectable recipes that are guaranteed to stir the kitchen witch in you. If you enjoyed what you just read and believe that true magic is in the everyday, subscribe to my newsletter below for regular doses of enchantment. Want even more inspiration? Follow me on Instagram, Facebook, Pinterest, and Twitter. Here’s to a magical life!